
SAFETY WARNING: Wear protective eyewear when handling compressed magazine springs.
Product Overview & Component Identification
|
Component |
Description |
Function
|
Picture |
|---|---|---|---|
|
Extension Body |
Main extended housing |
Slides onto the magazine body rails and holds extra capacity. |
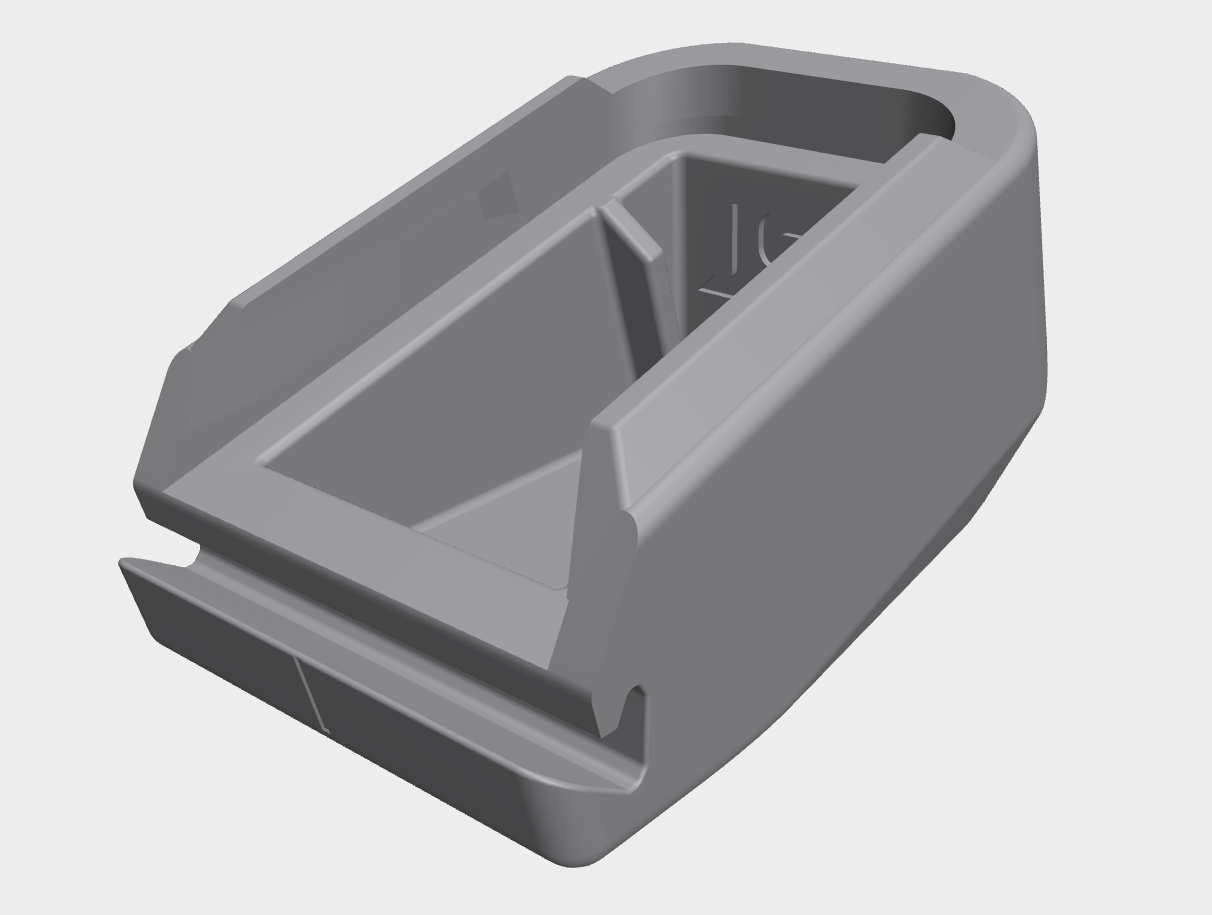 |
|
Internal Insert |
Spring seat retaining cup |
Supports the base of the magazine spring and locks into the inner floor cavity. |
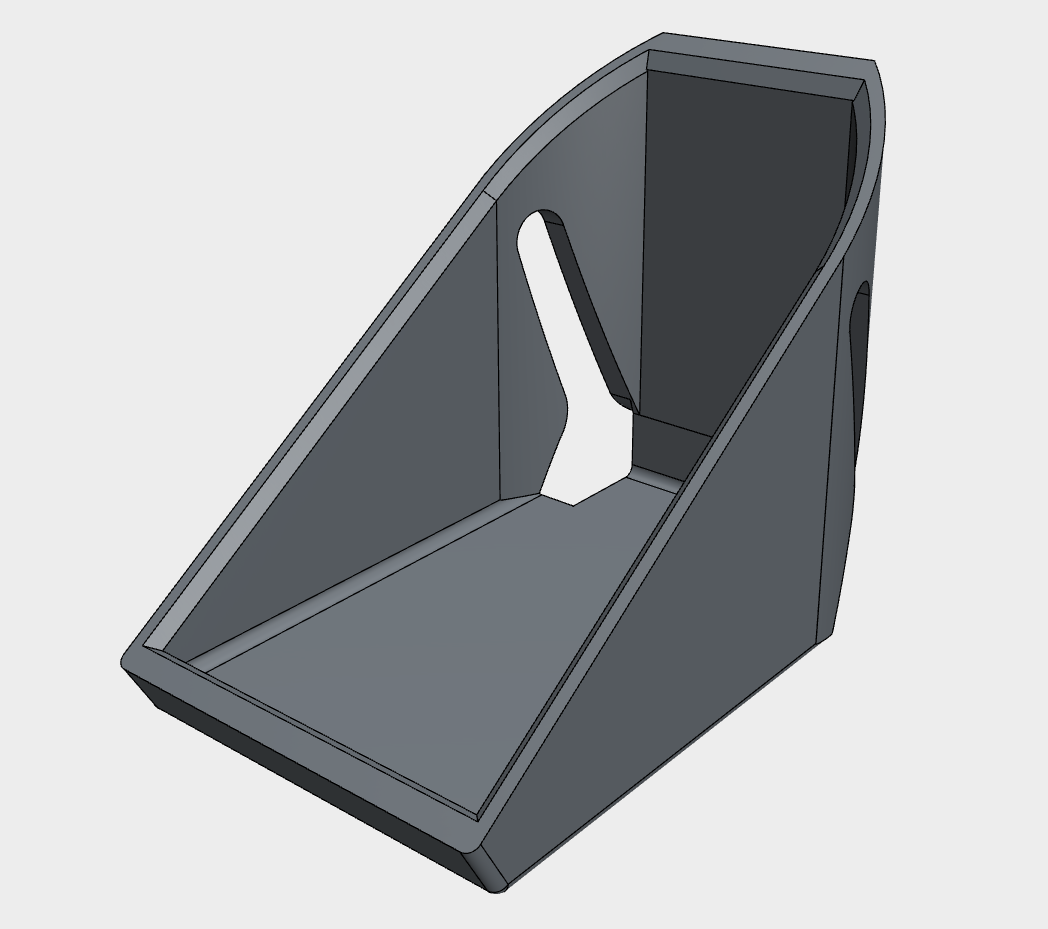 |
|
Dovetail Rear Retainer |
Dovetailed lock key |
Slides into the rear dovetail interface to lock the body to the magazine frame. |
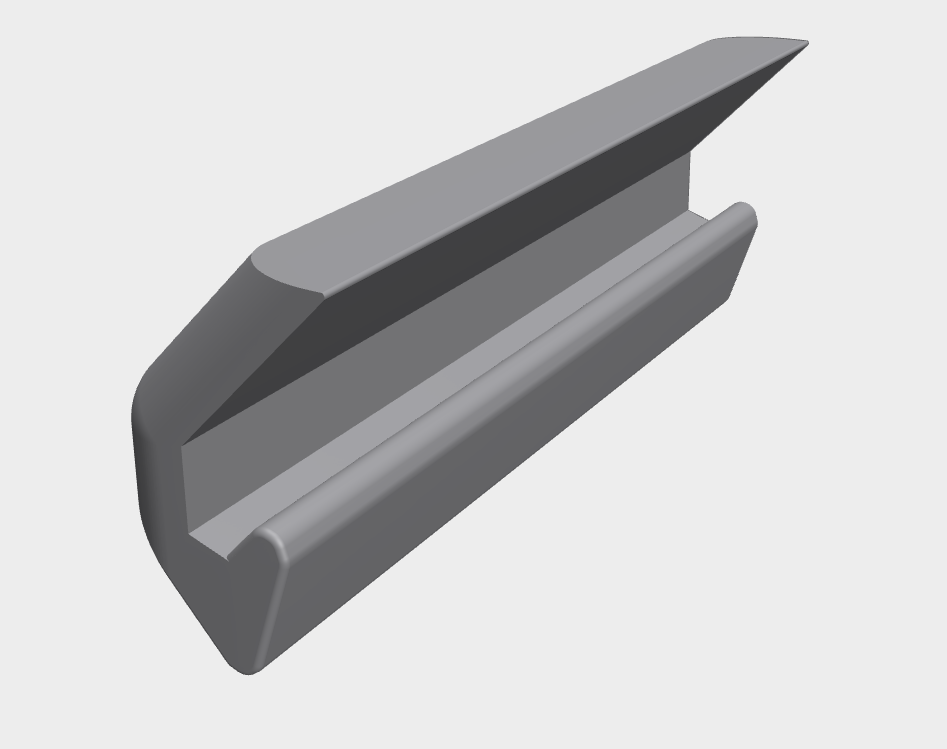 |
Required Tools:
- Glock magazine disassembly tool or standard punch (3/32" / 2.5mm)
- Small nylon/rubber mallet or light hammer
- Safety glasses
- Microfiber towel
- Pliers
Step-by-Step Assembly Instructions
Step 1: Disassemble the Factory Magazine
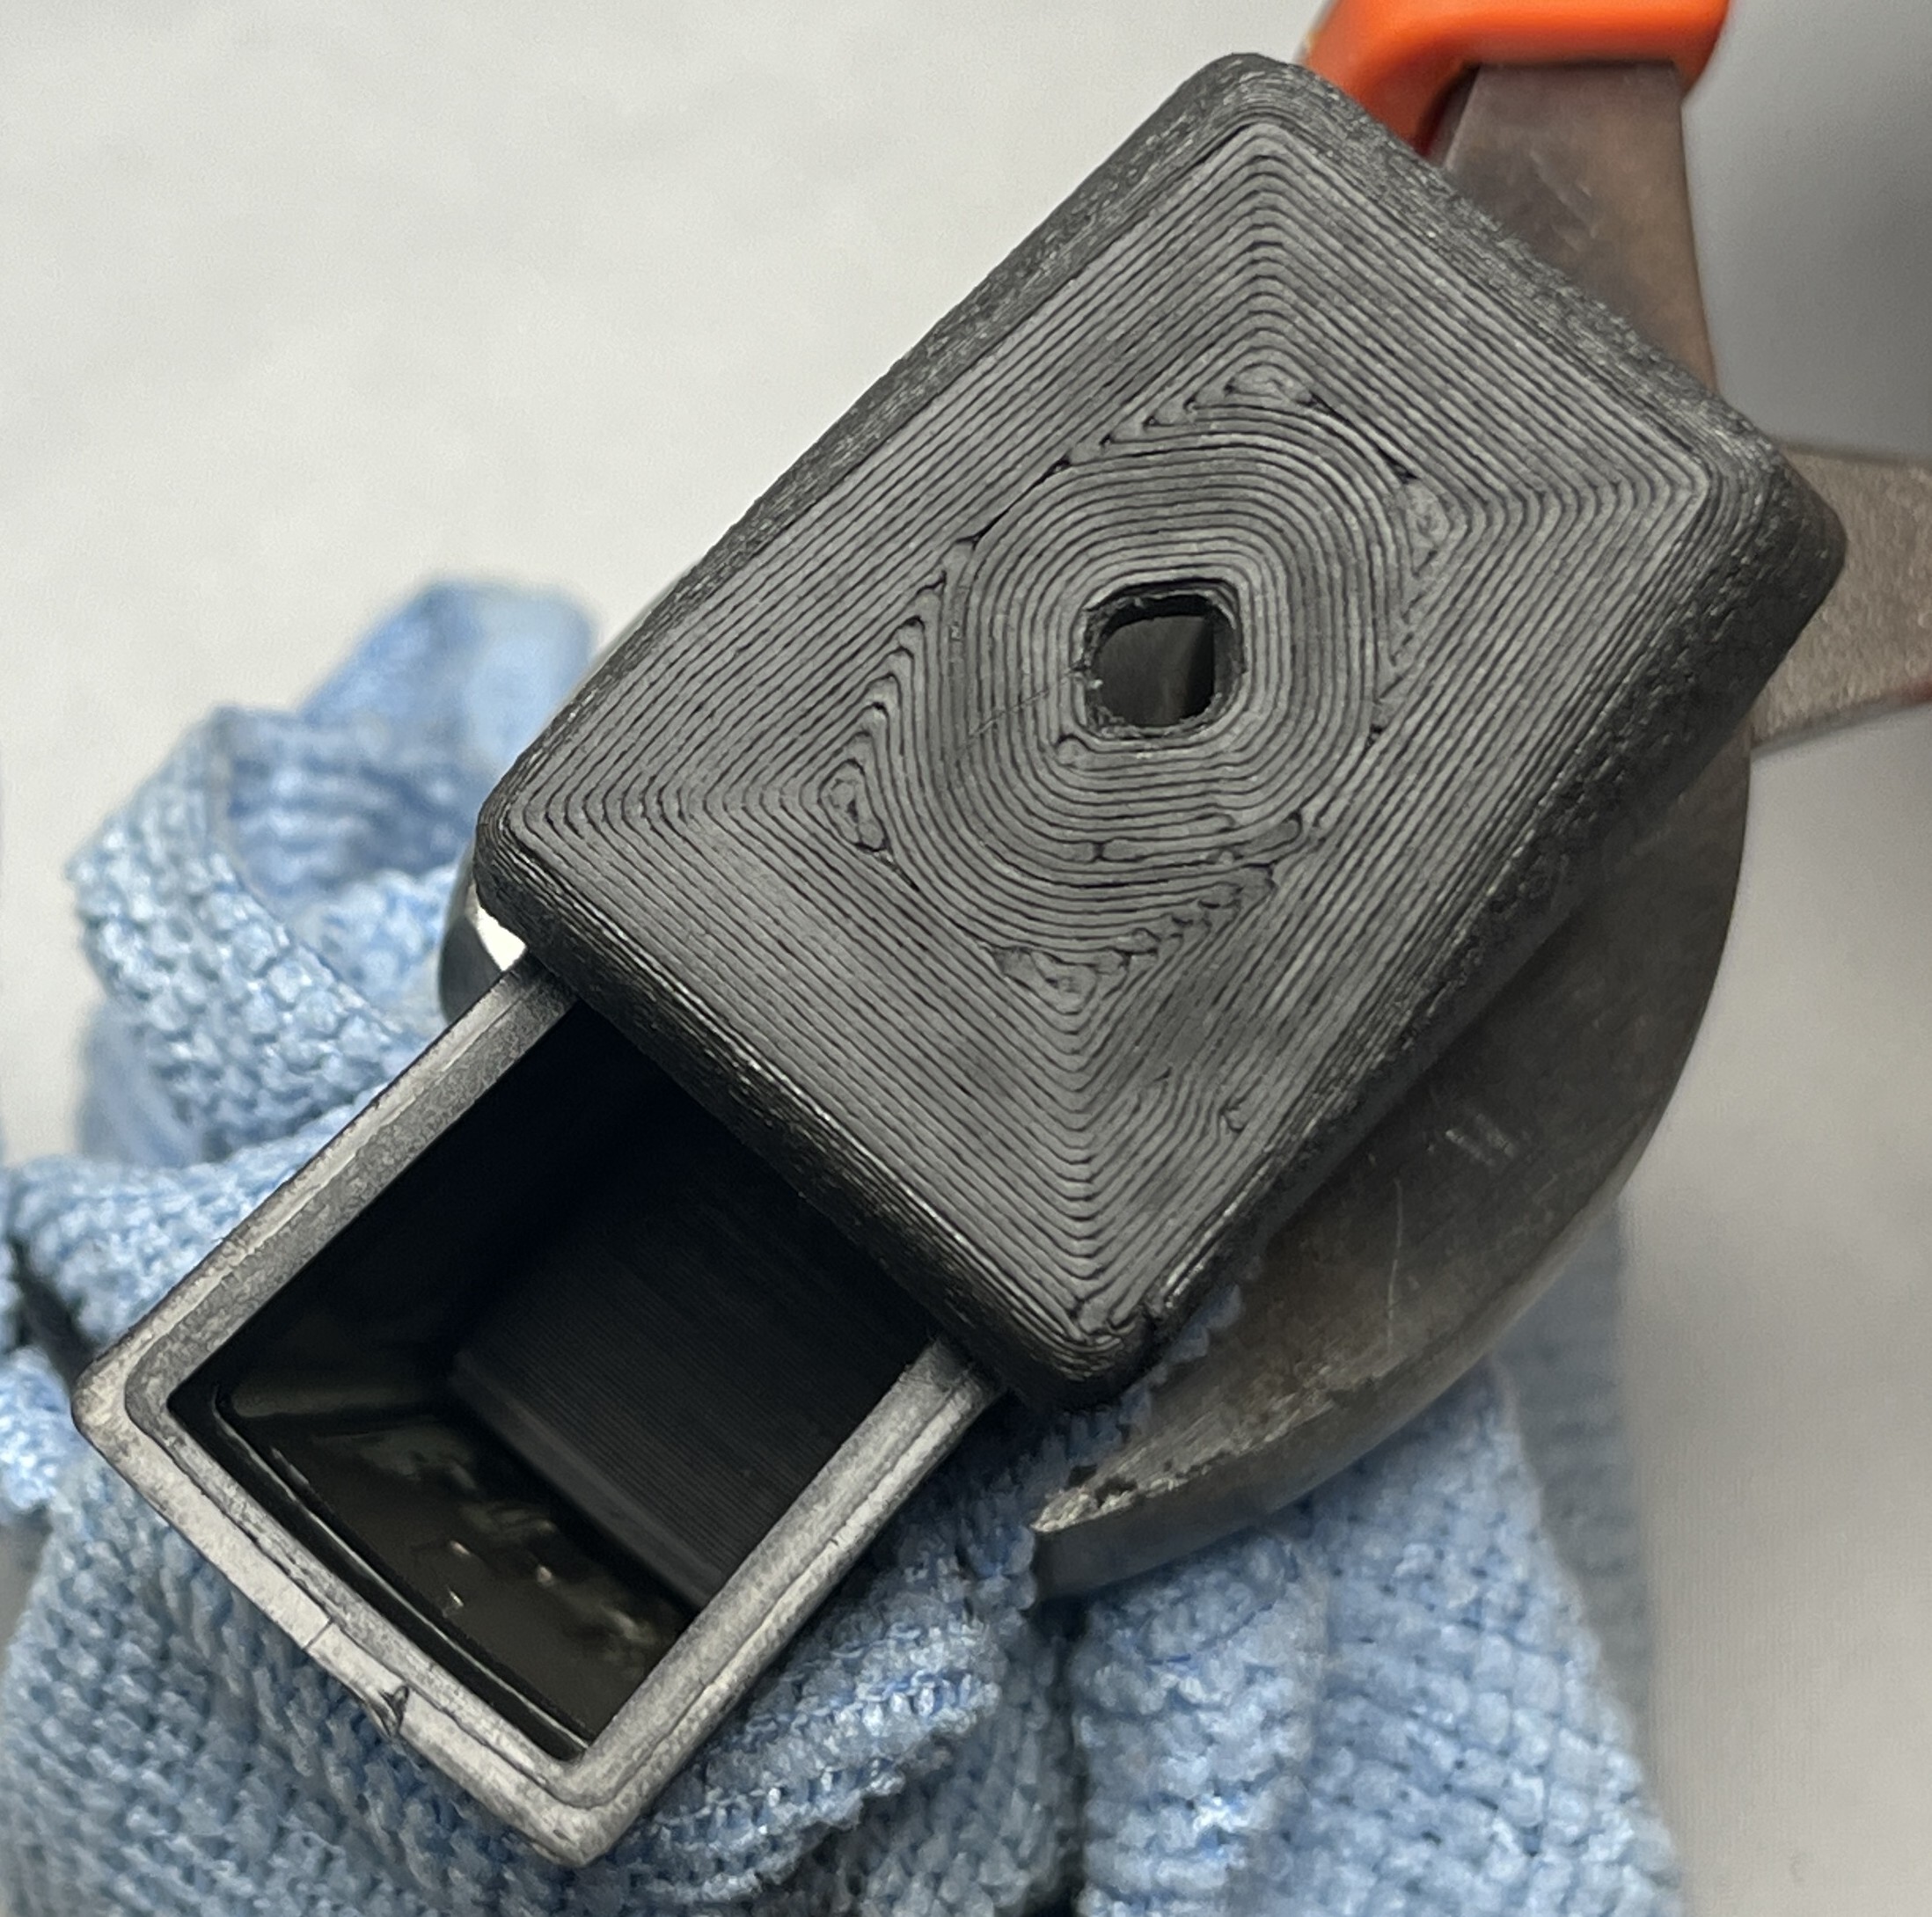
- Wrap the magazine body with a microfiber cloth and hold the sides the the pliers
- Insert your punch or disassembly tool into the center hole on the bottom of the OEM magazine floor plate to compress the internal insert pin.
- Pinch the sides of the OEM magazine body with the pliers and push the factory floor plate forward off the rails.
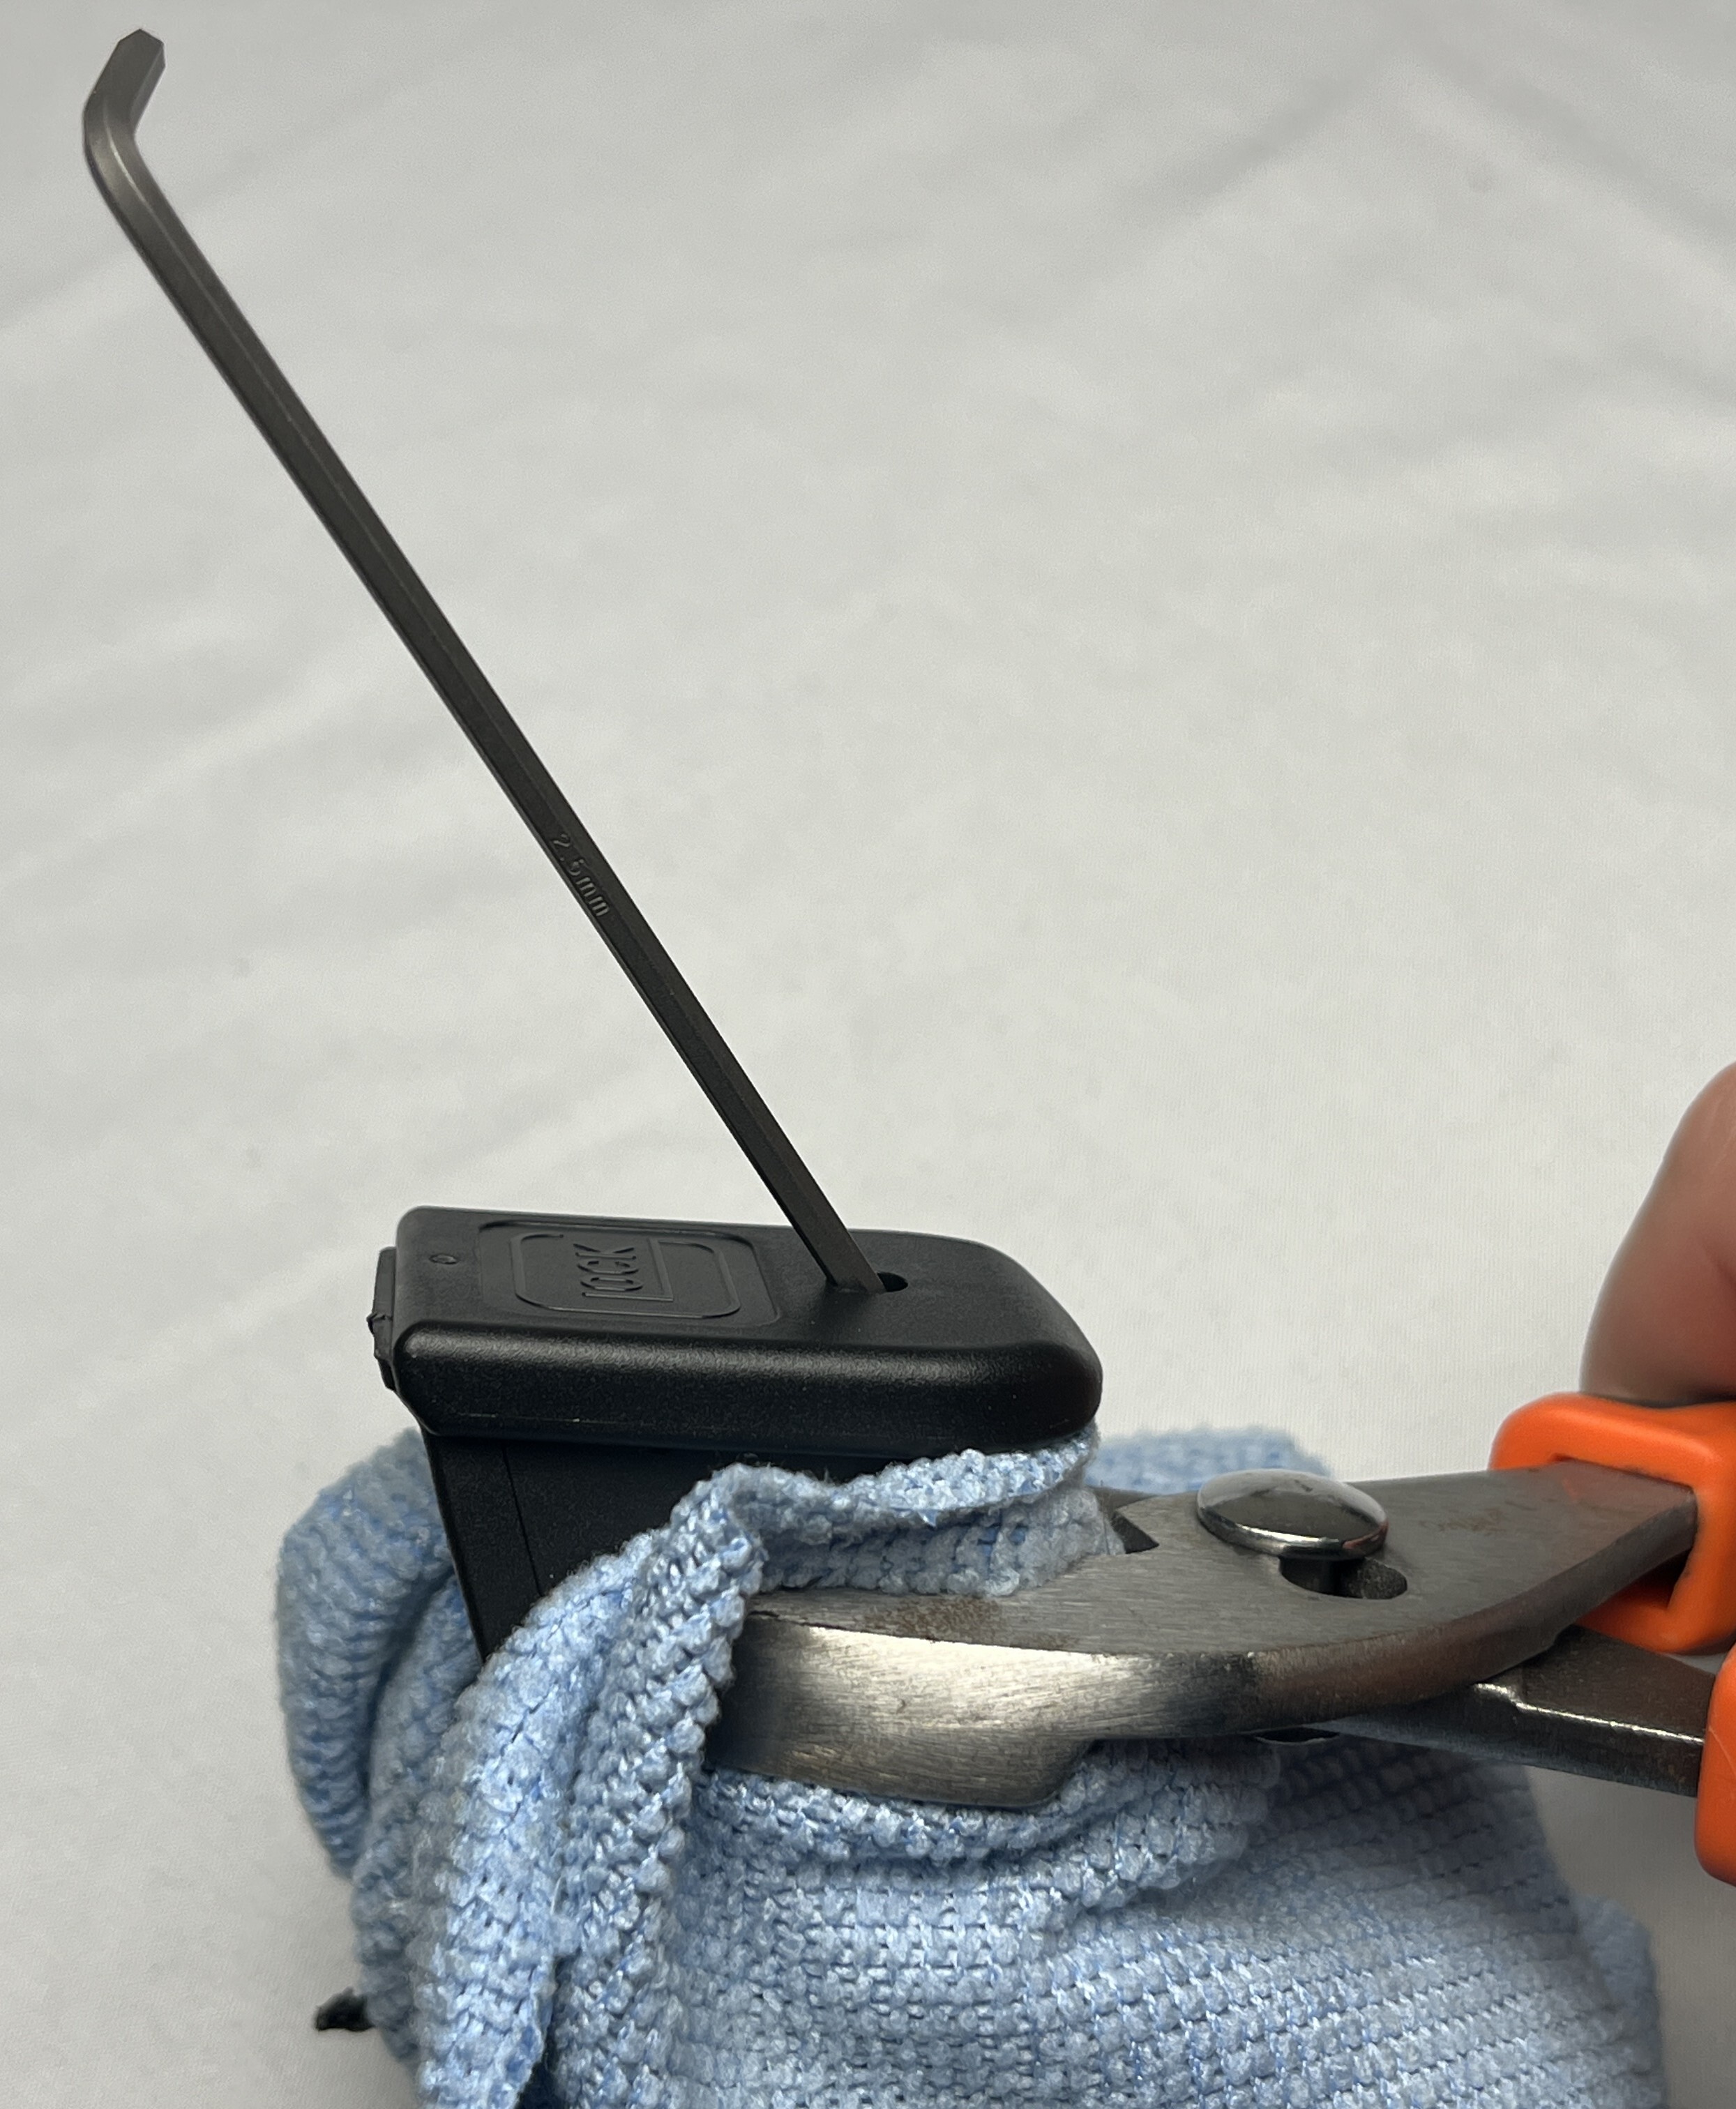
4. Keep your thumb firmly over the bottom opening to prevent the compressed magazine spring from flying out.
5. Remove the OEM floor plate and factory insert. Retain the spring.
Step 2: Install the Extended Internal Insert
- Seat the bottom loop of your magazine spring into the top cup of the new Internal Insert.
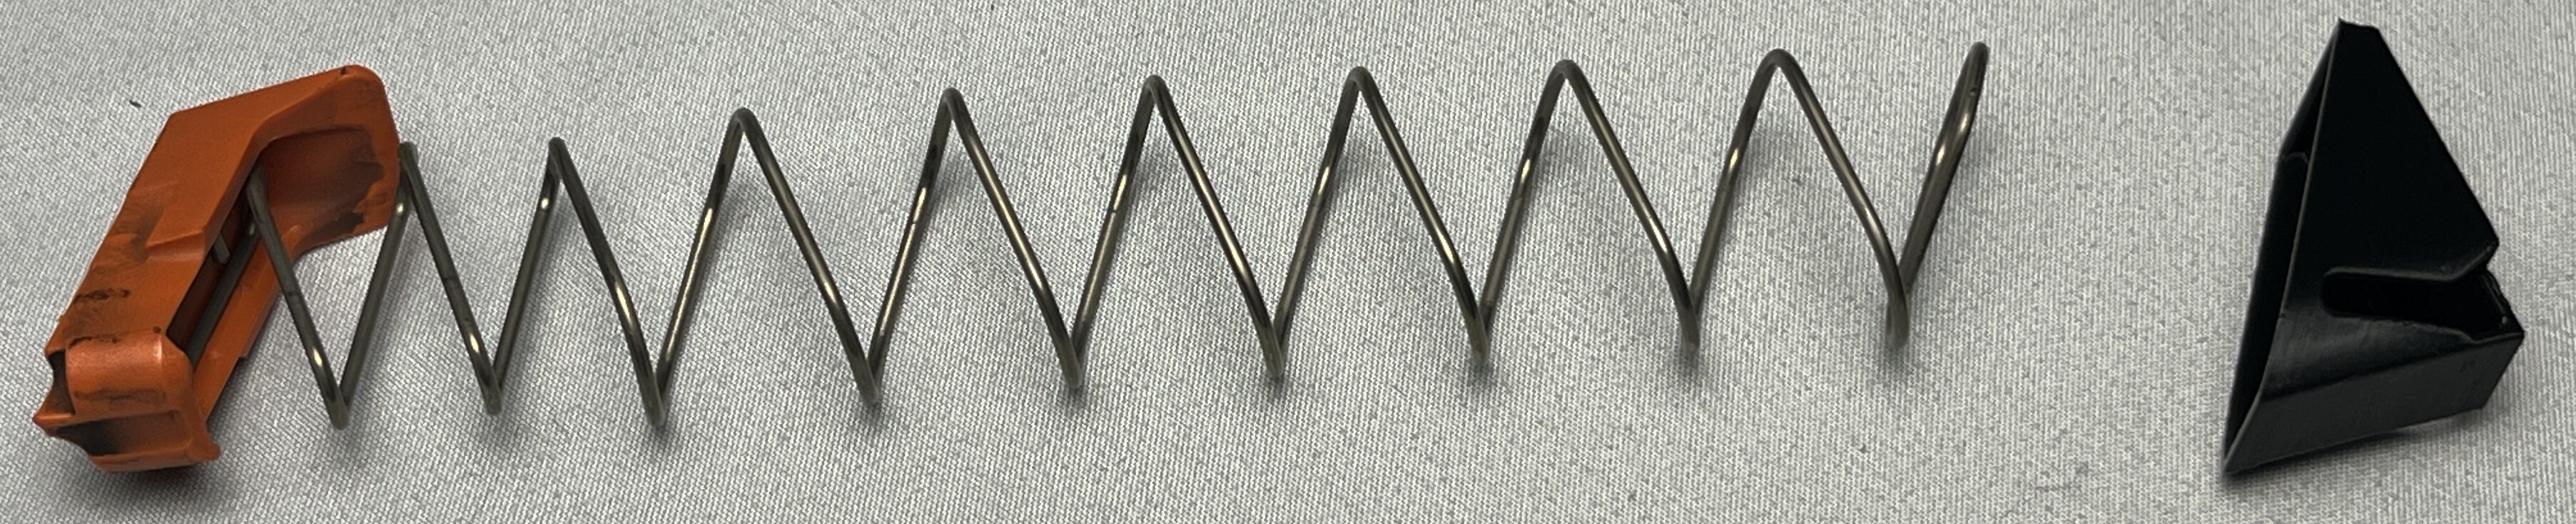
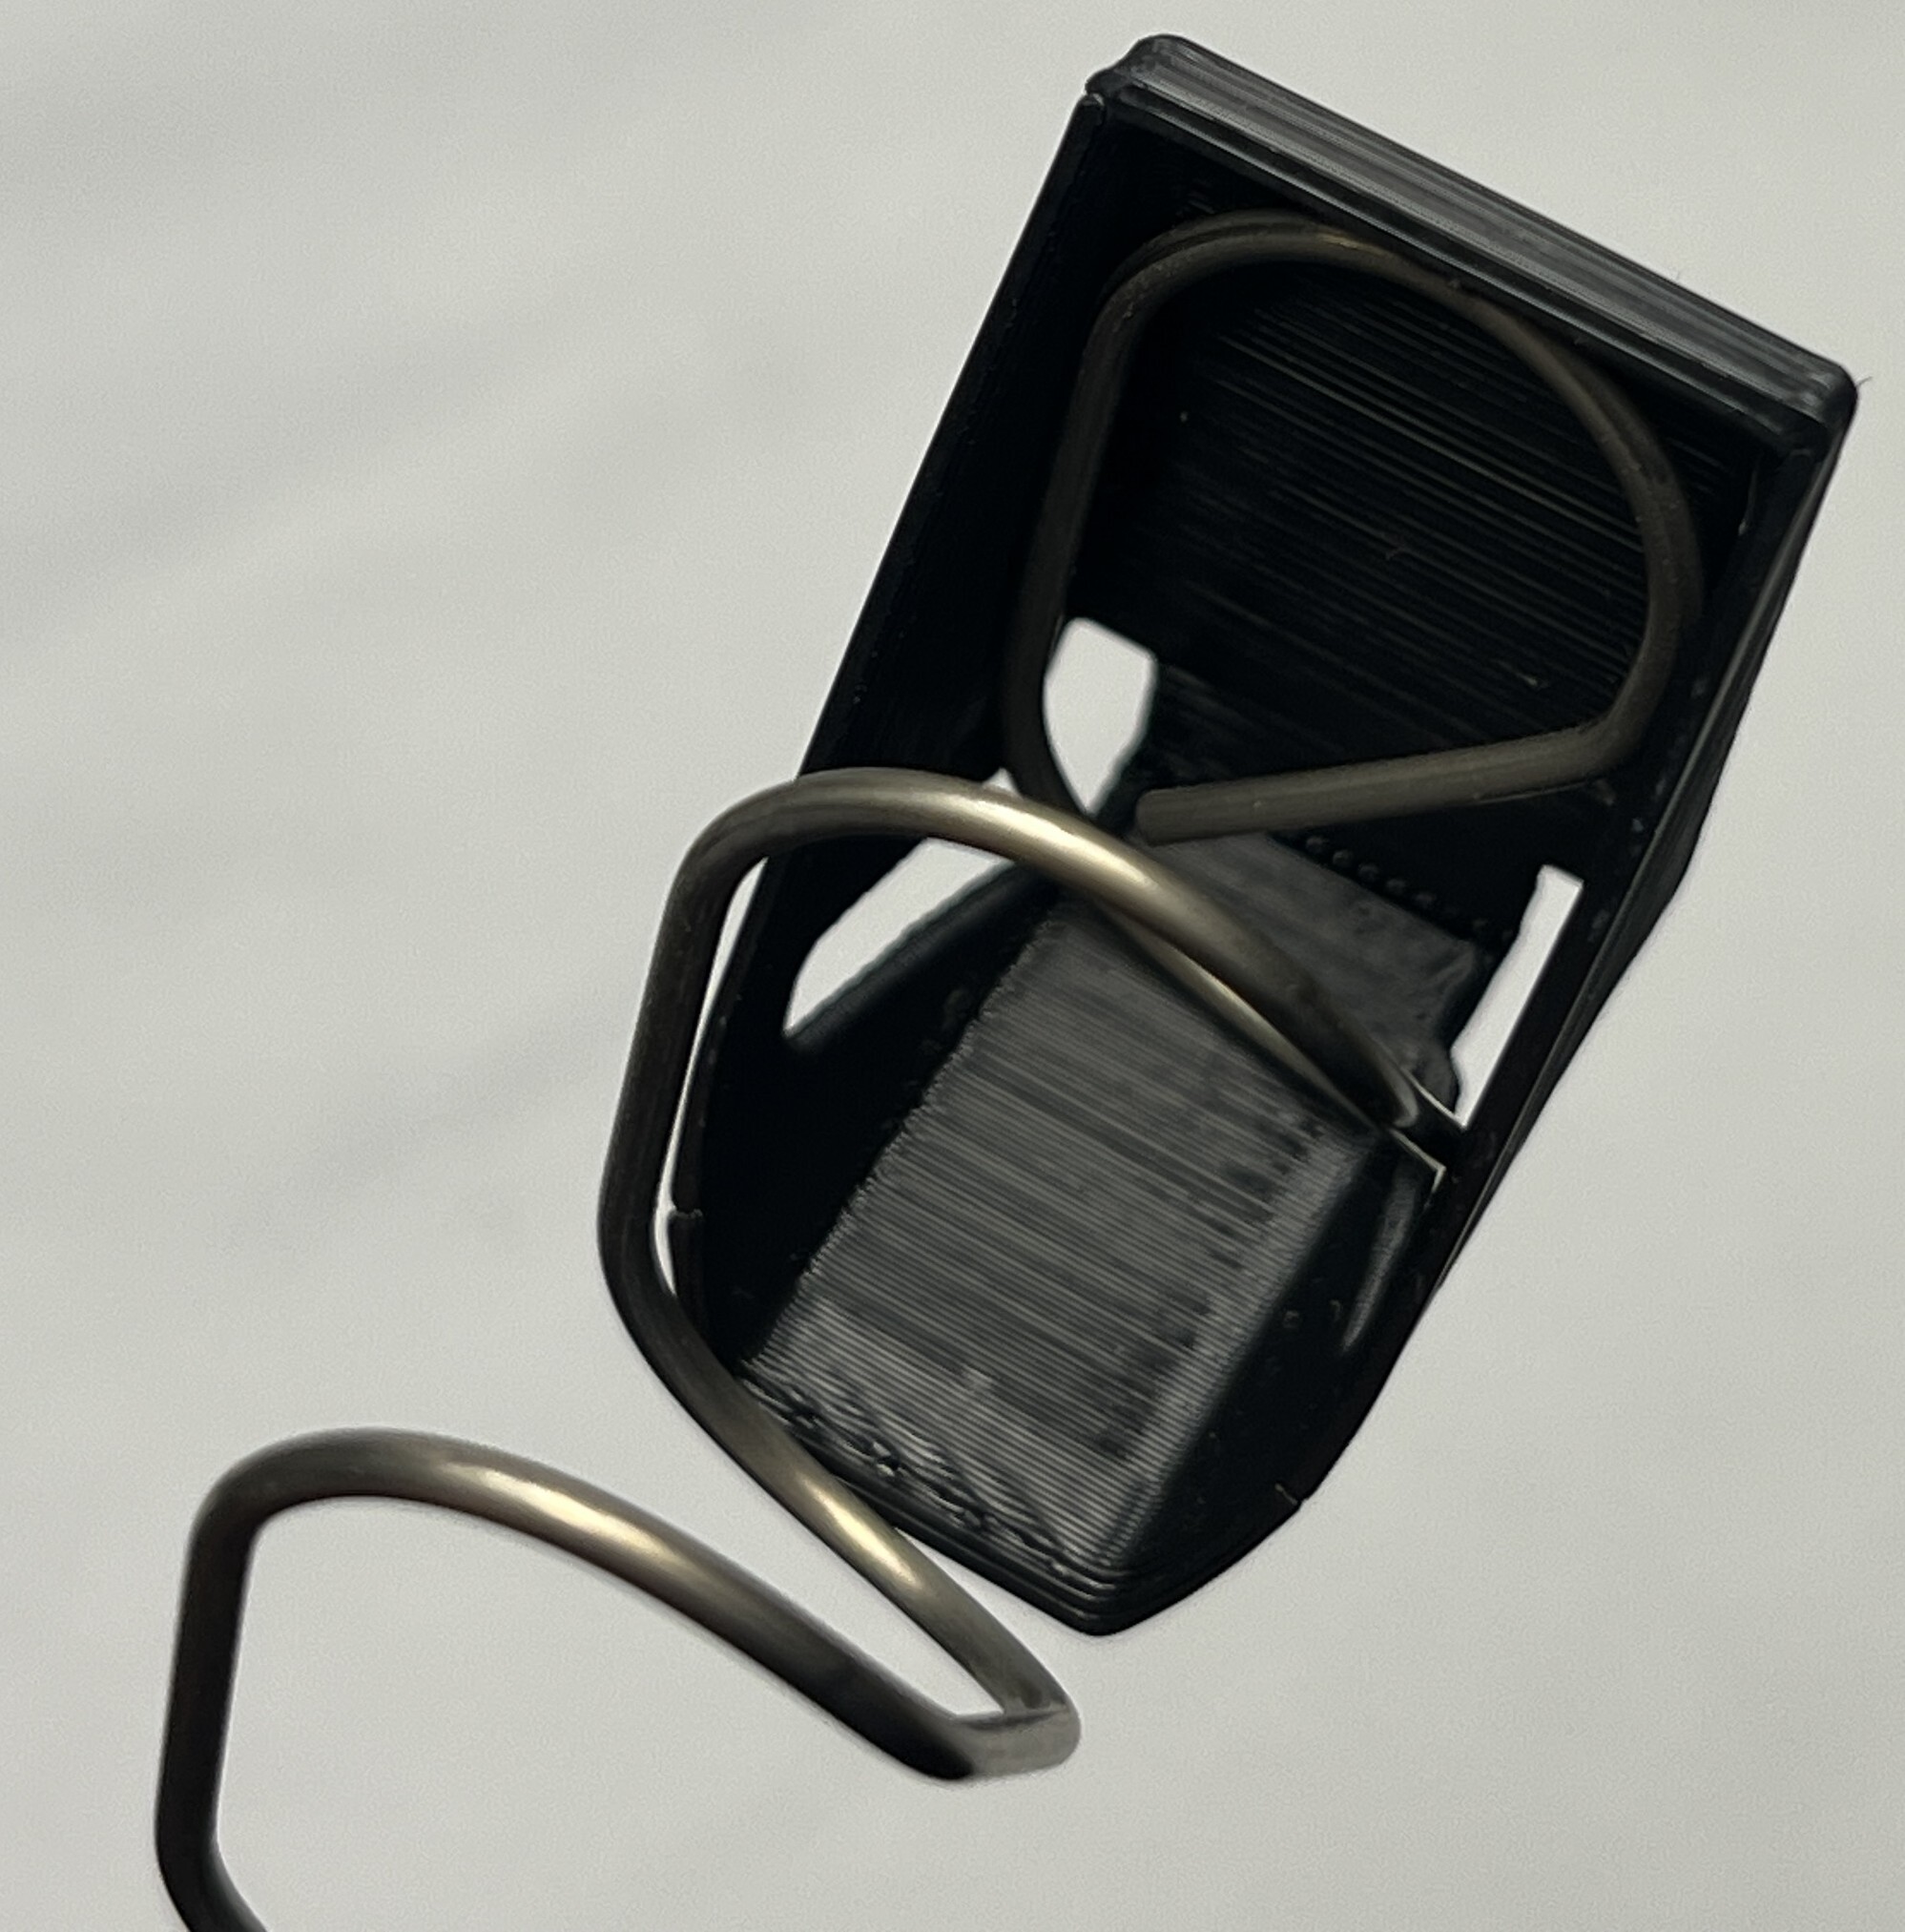
- The tall side should be facing the font of the magazine body.
- Orient the insert so it fits smoothly into the profile of the lower magazine body.
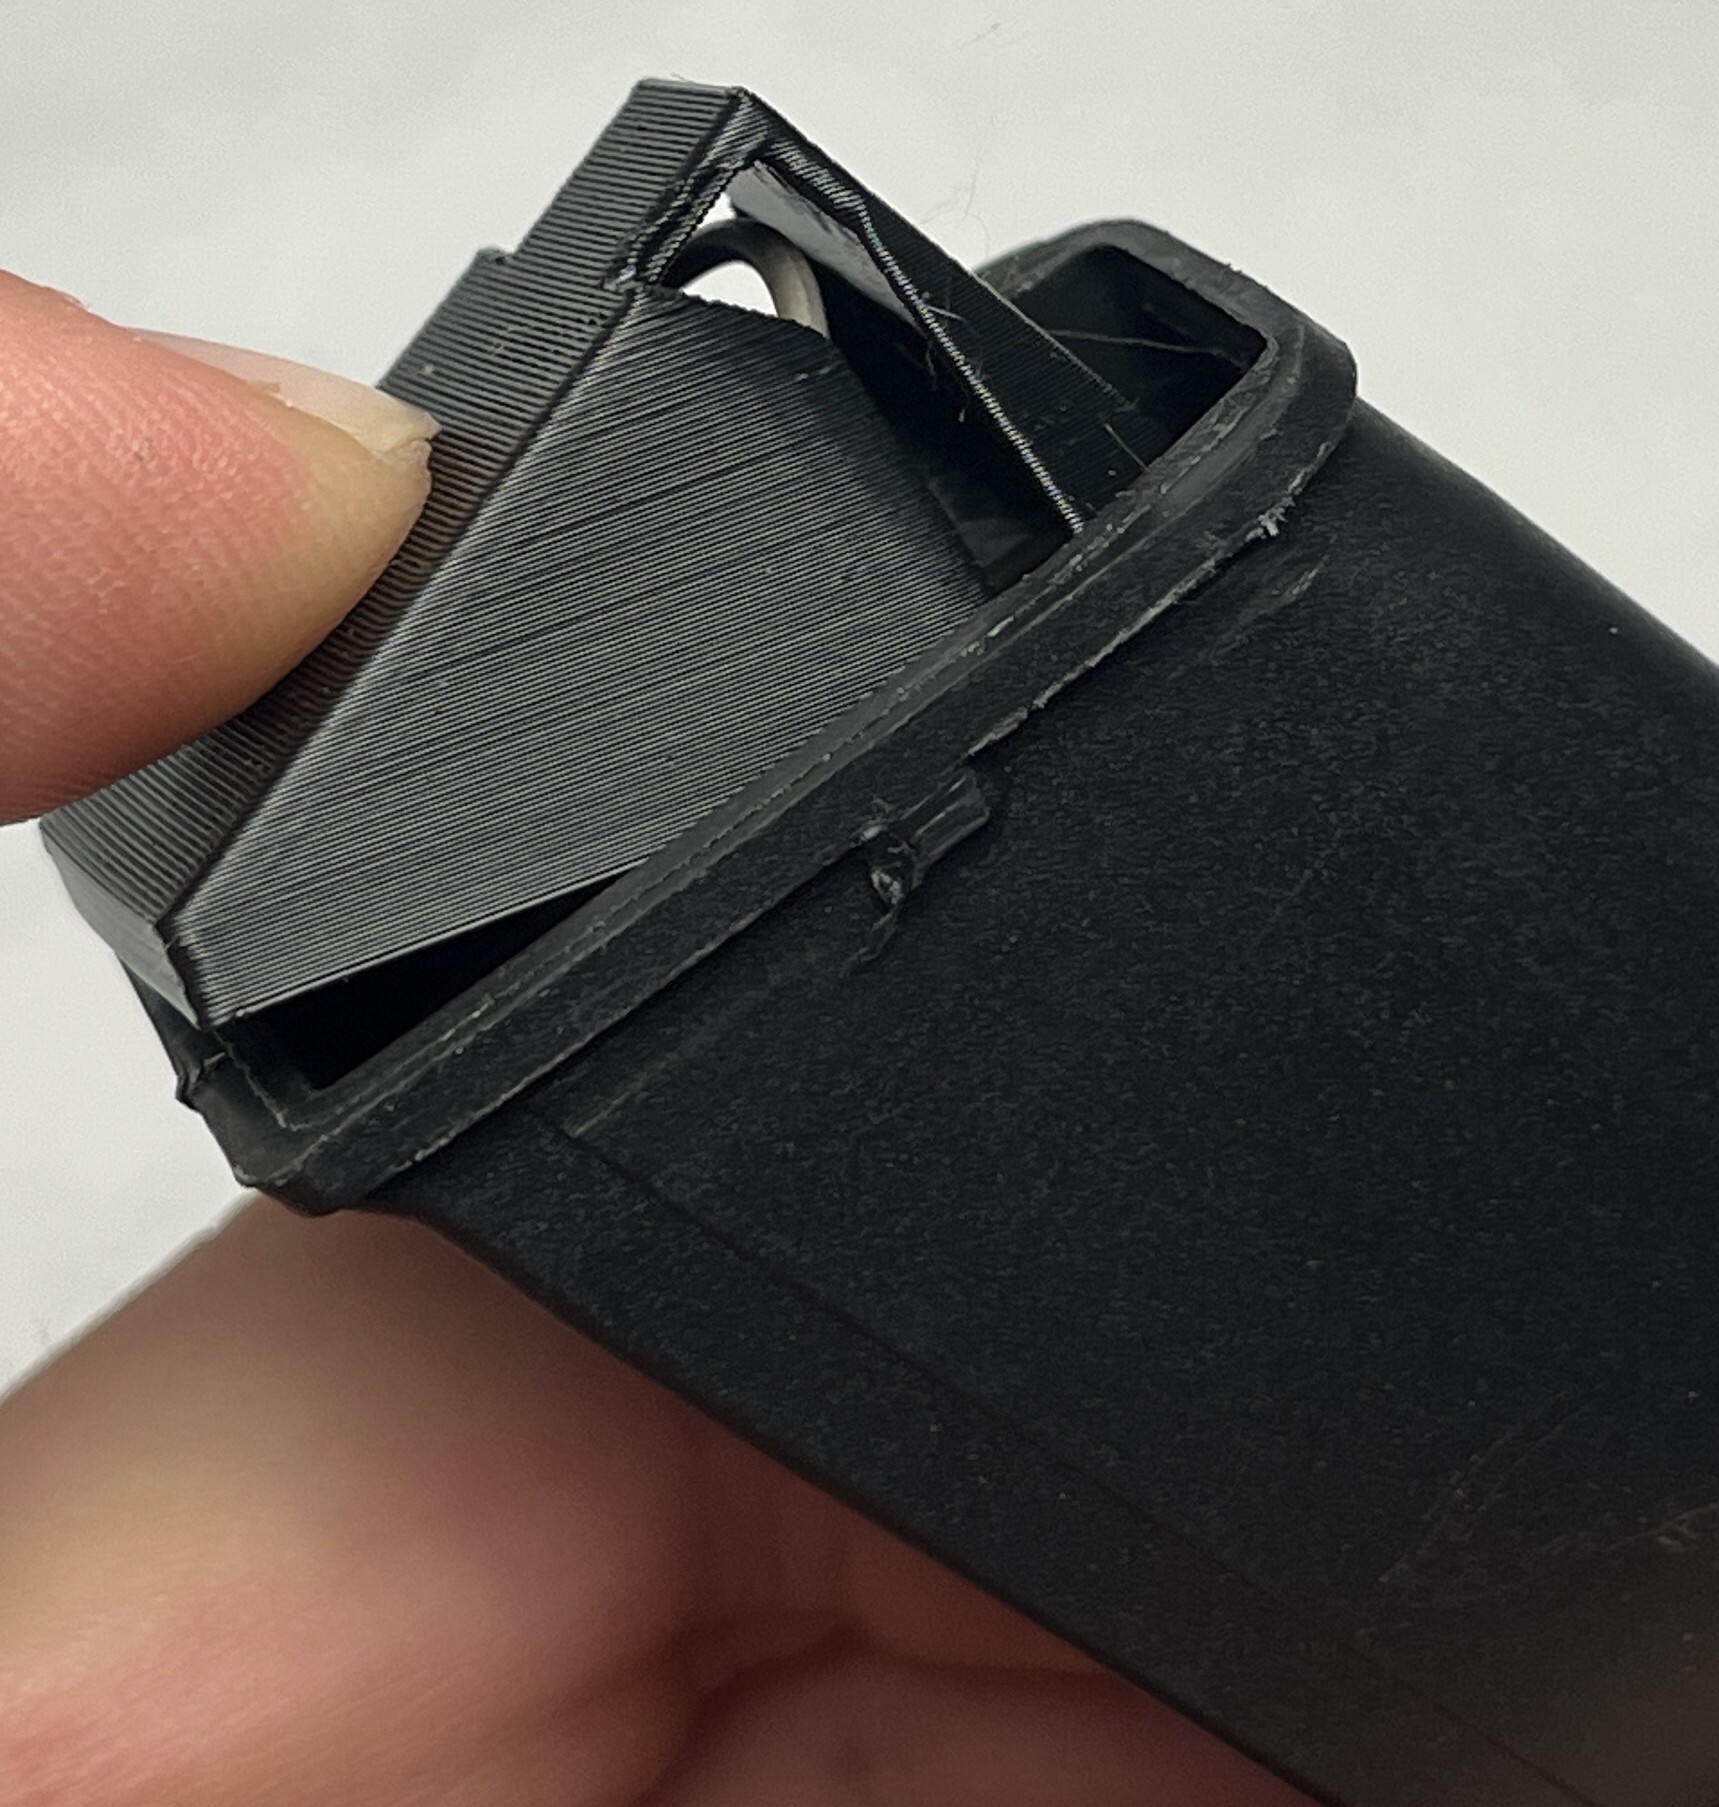
- Push the spring and insert up into the magazine tube.
Step 3: Attach the Extension Body
- Maintain upward thumb pressure on the internal insert to keep the spring compressed inside the magazine tube.
- Align the rails of the Extension Body with the bottom track of the magazine body.
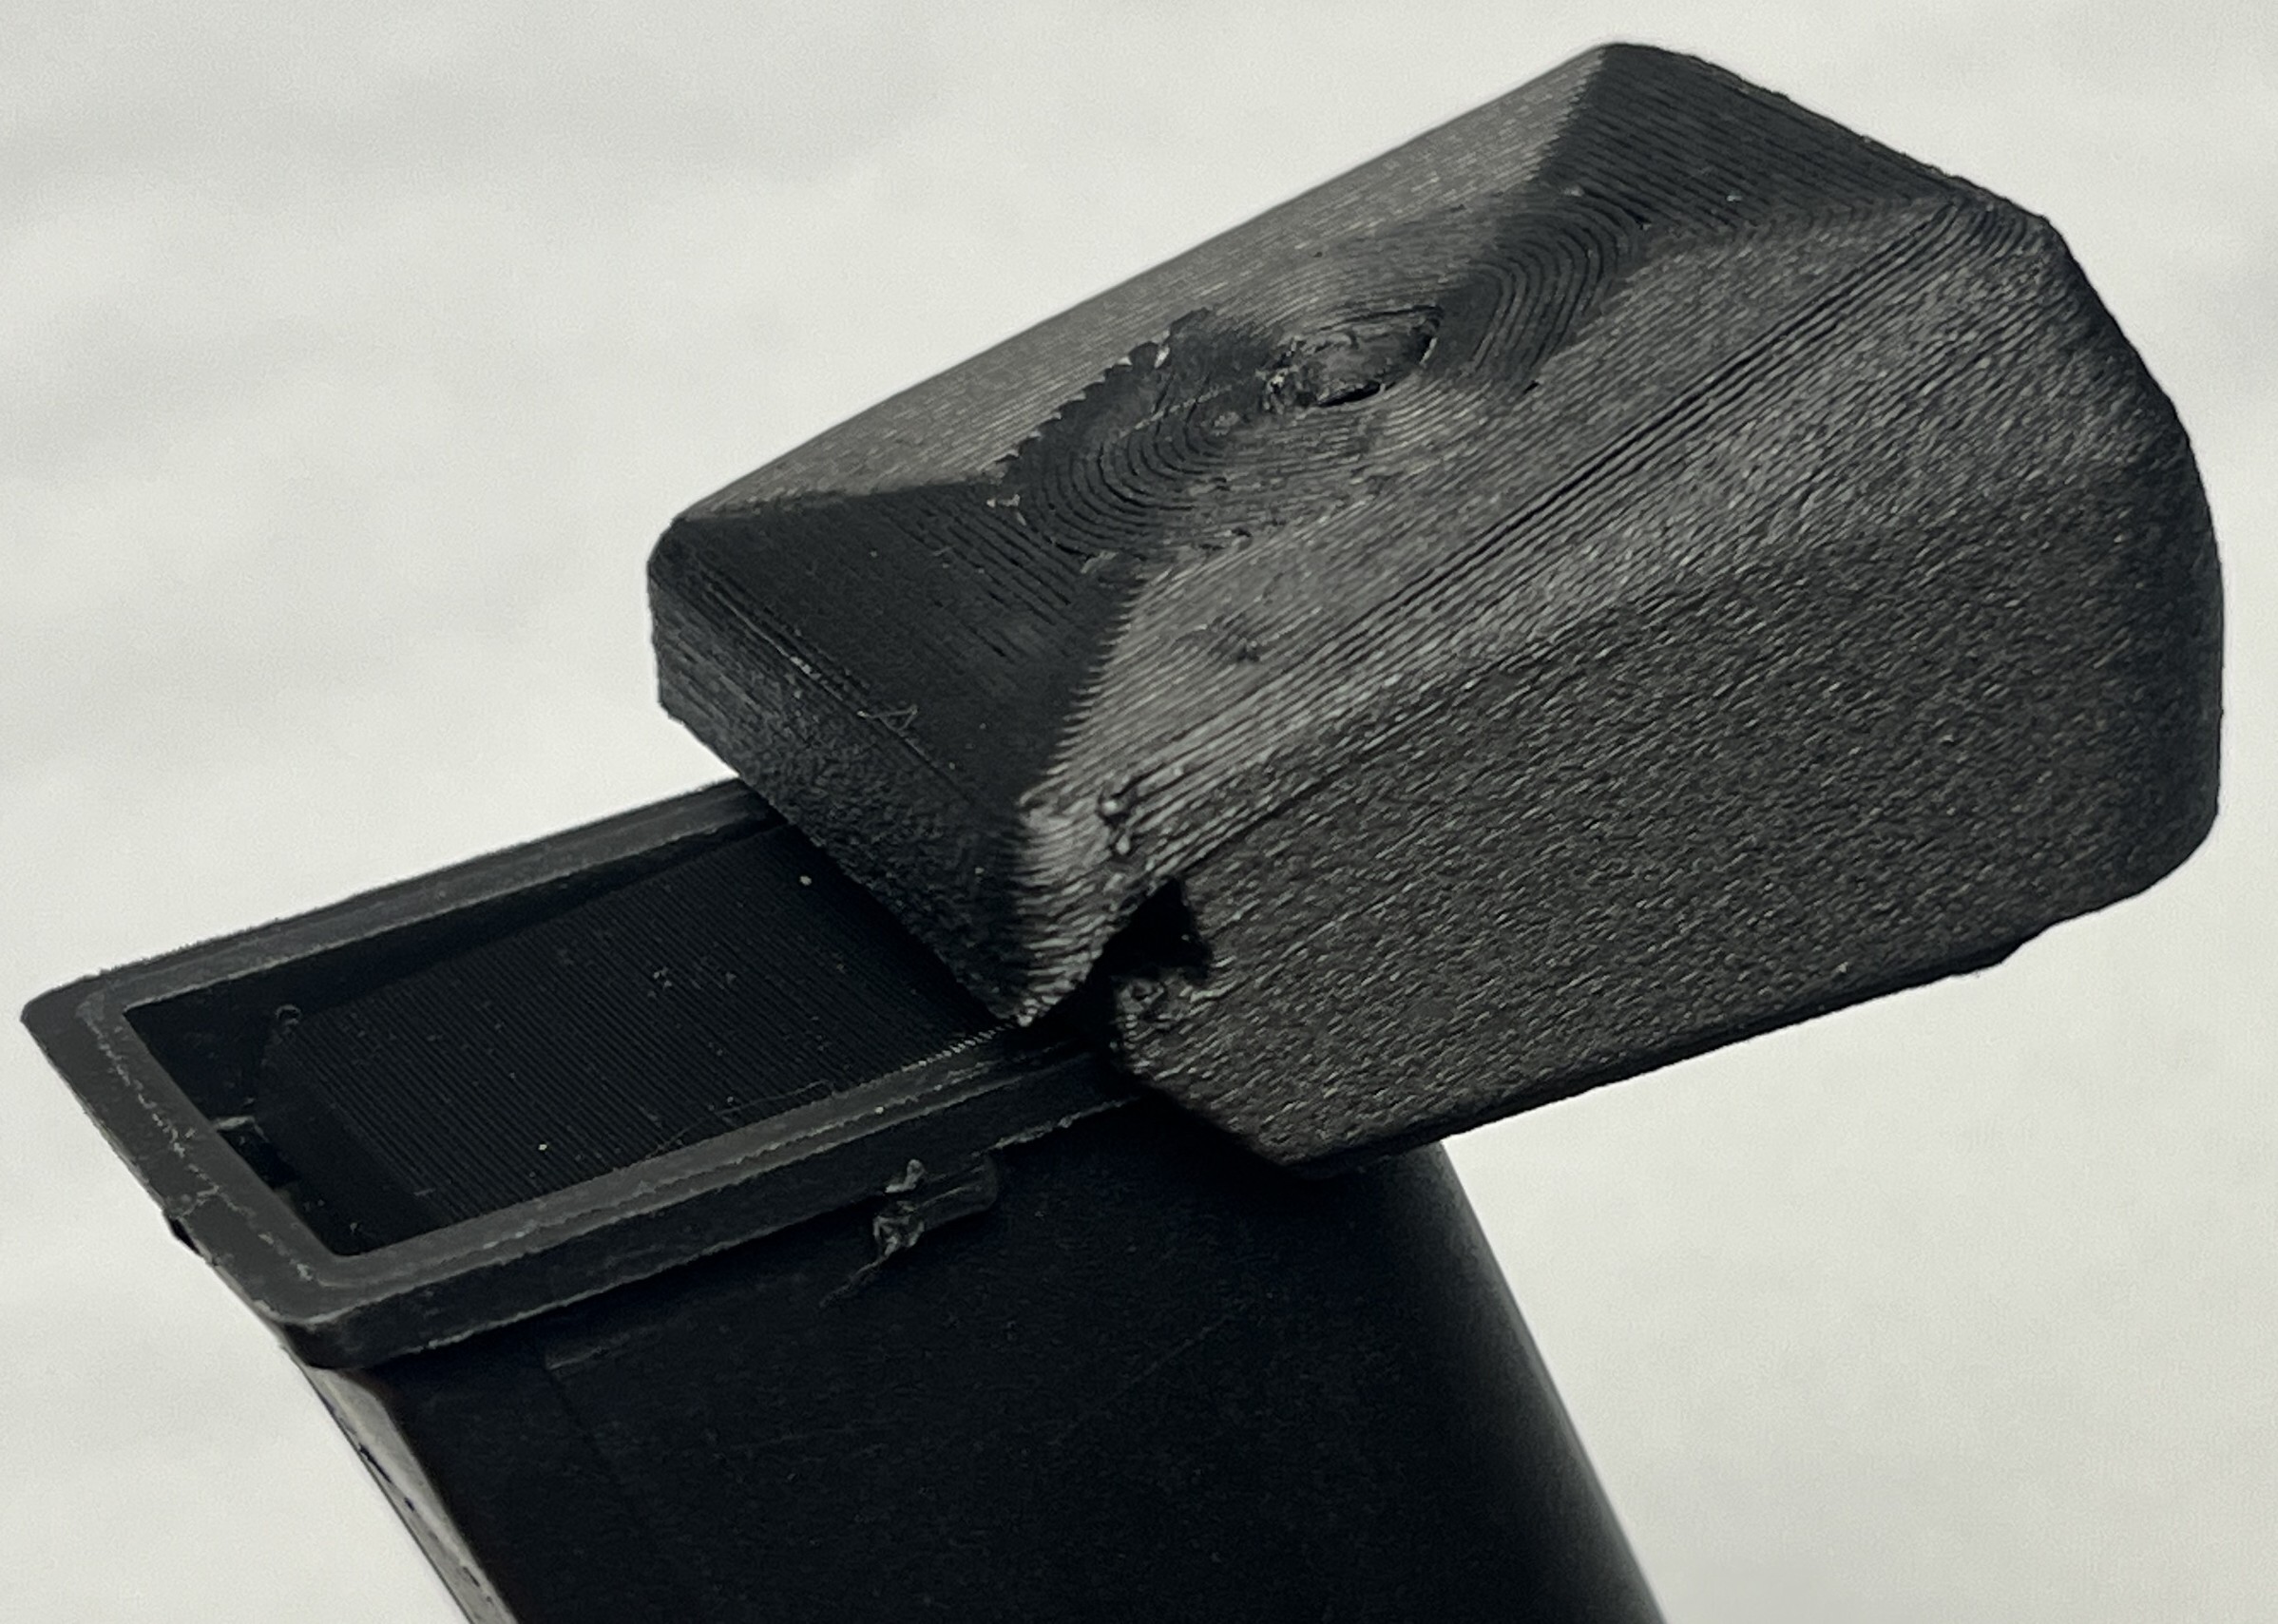
- While squeezing the body with pliers and cloth again, slide the extension body onto the magazine rails from front to back, exactly like a factory floor plate, until it aligns with the base.
- Make sure there is no gap between the front of the magazine body and front lip of the extension
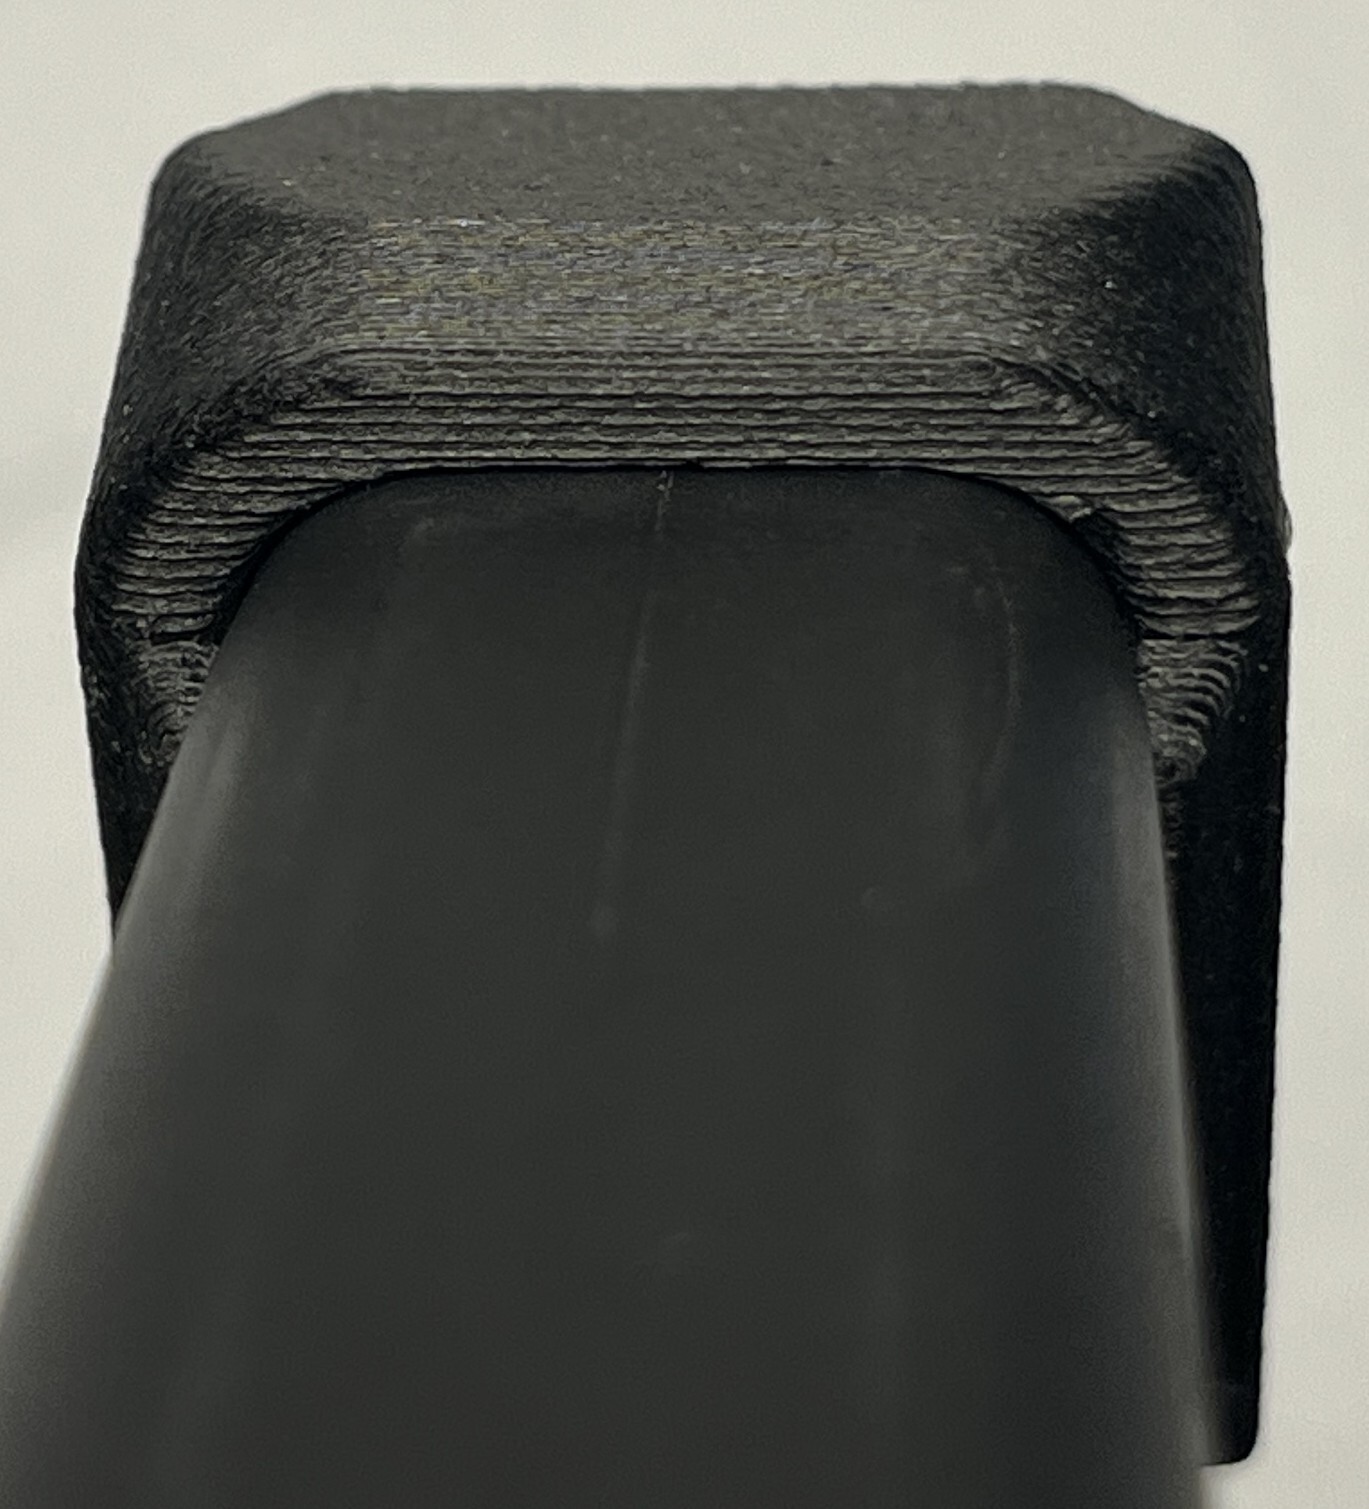
- G19 magazines have a slightly different geometry and will have a slight gap
- Pushing down on the microfiber towel for the last bit of movement helps
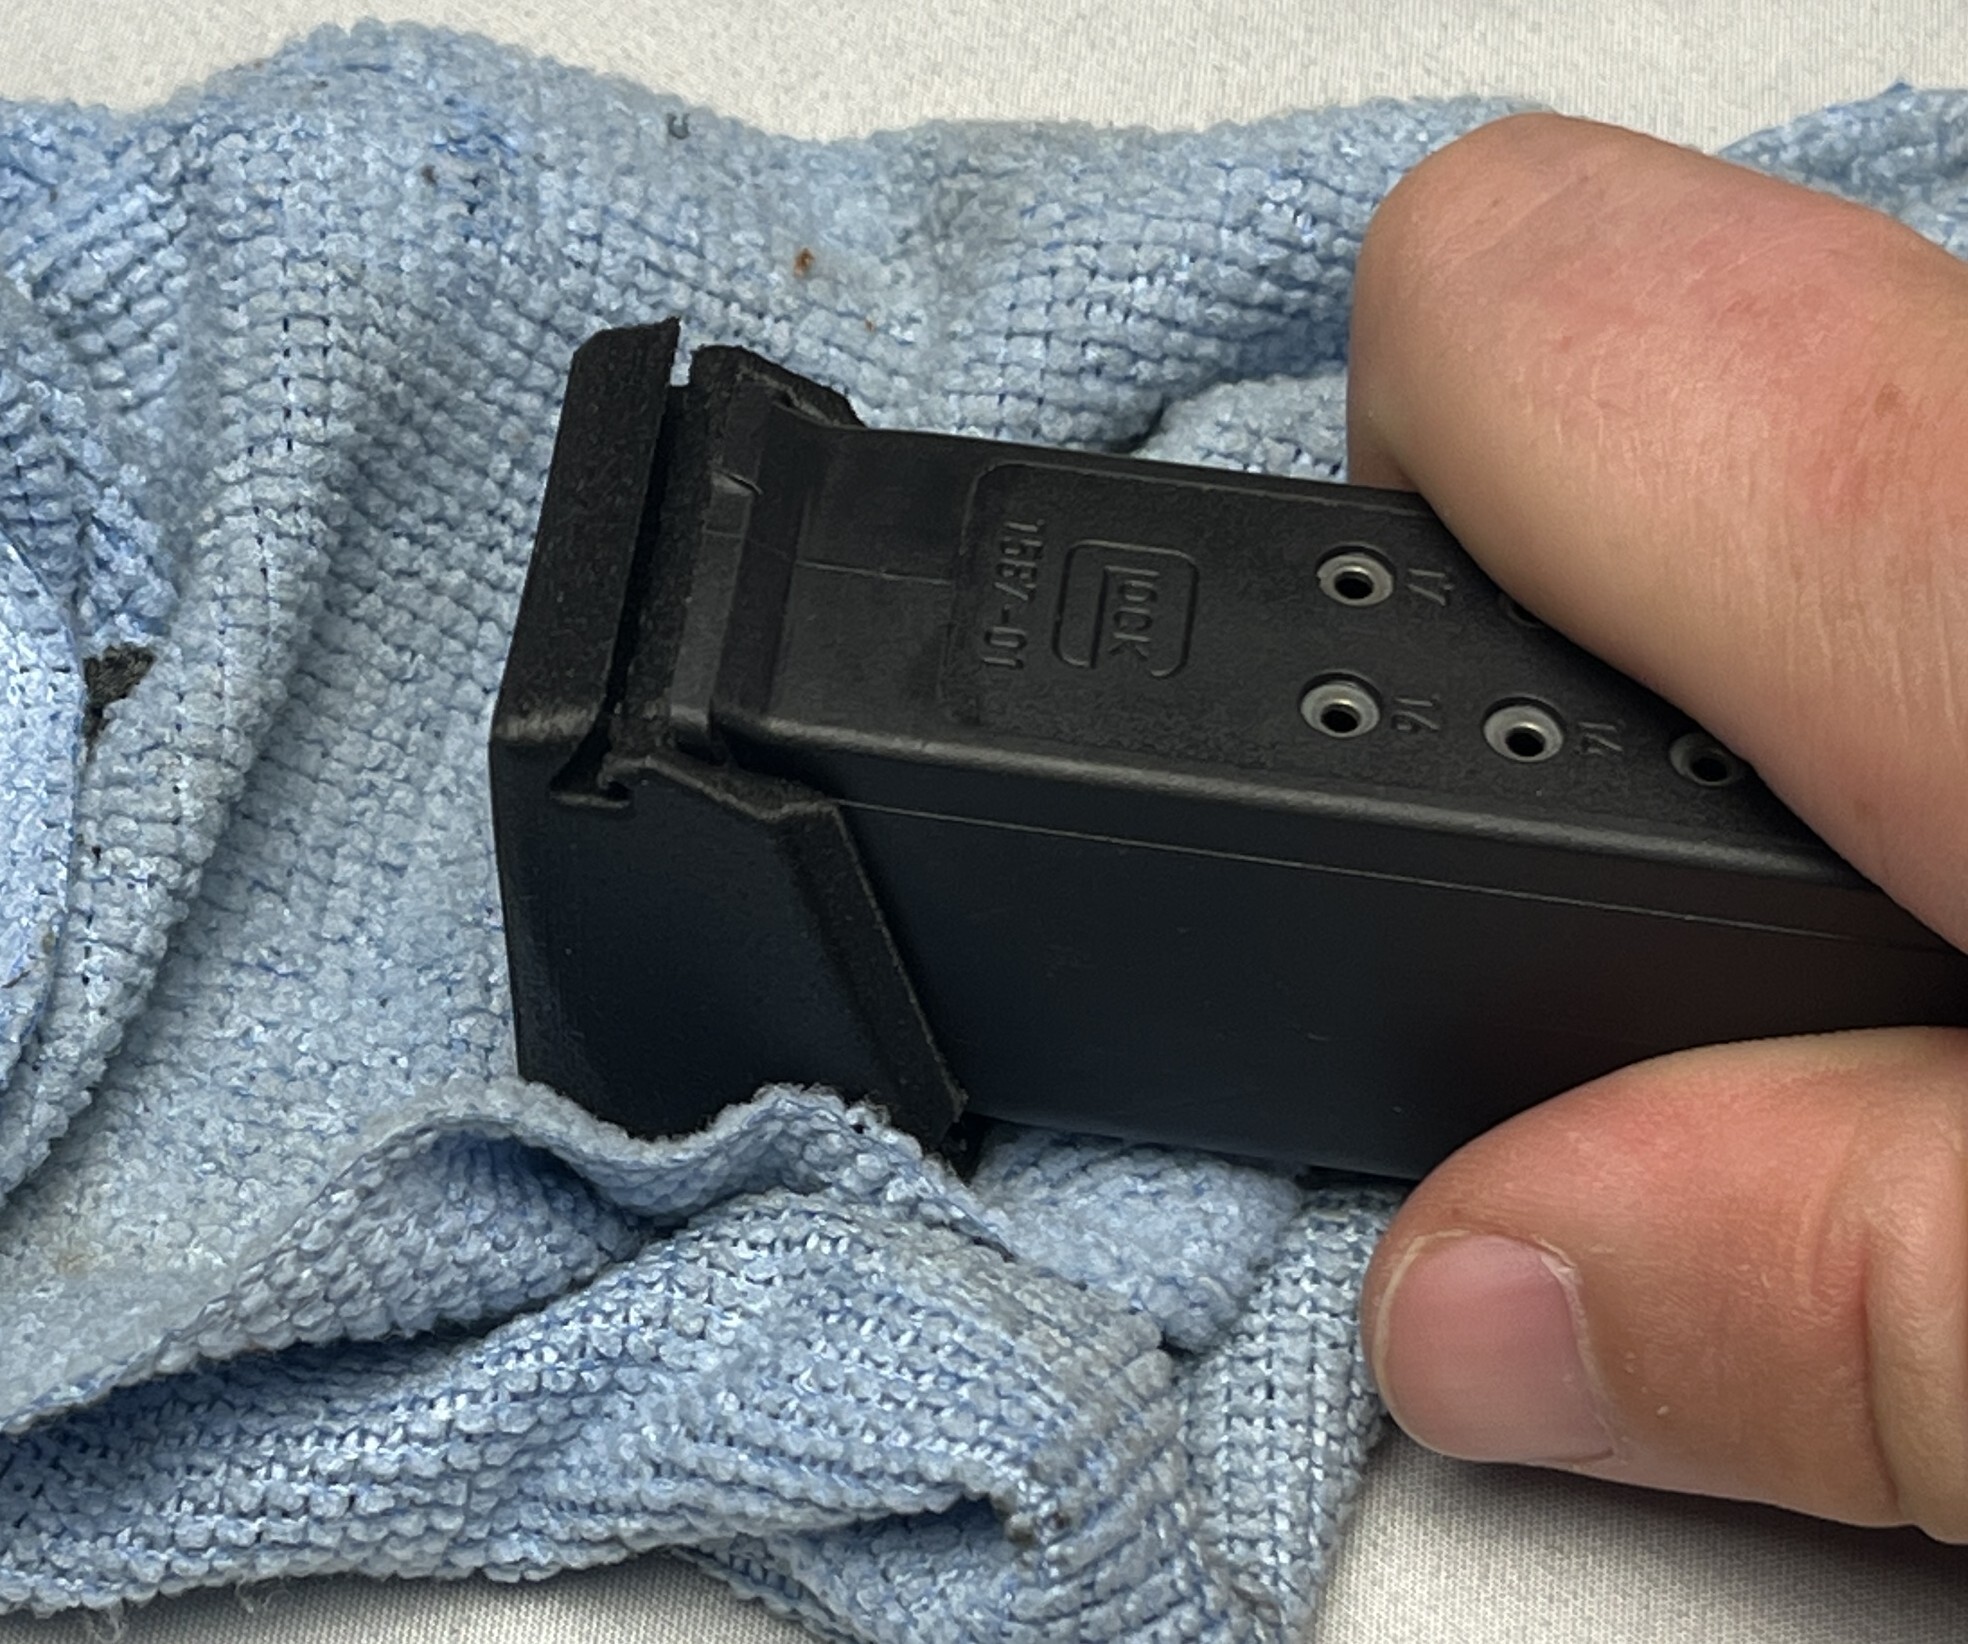
- Make sure there is no gap between the front of the magazine body and front lip of the extension
4. Allow the internal insert to drop down and seat into the bottom cavity of the extension body.
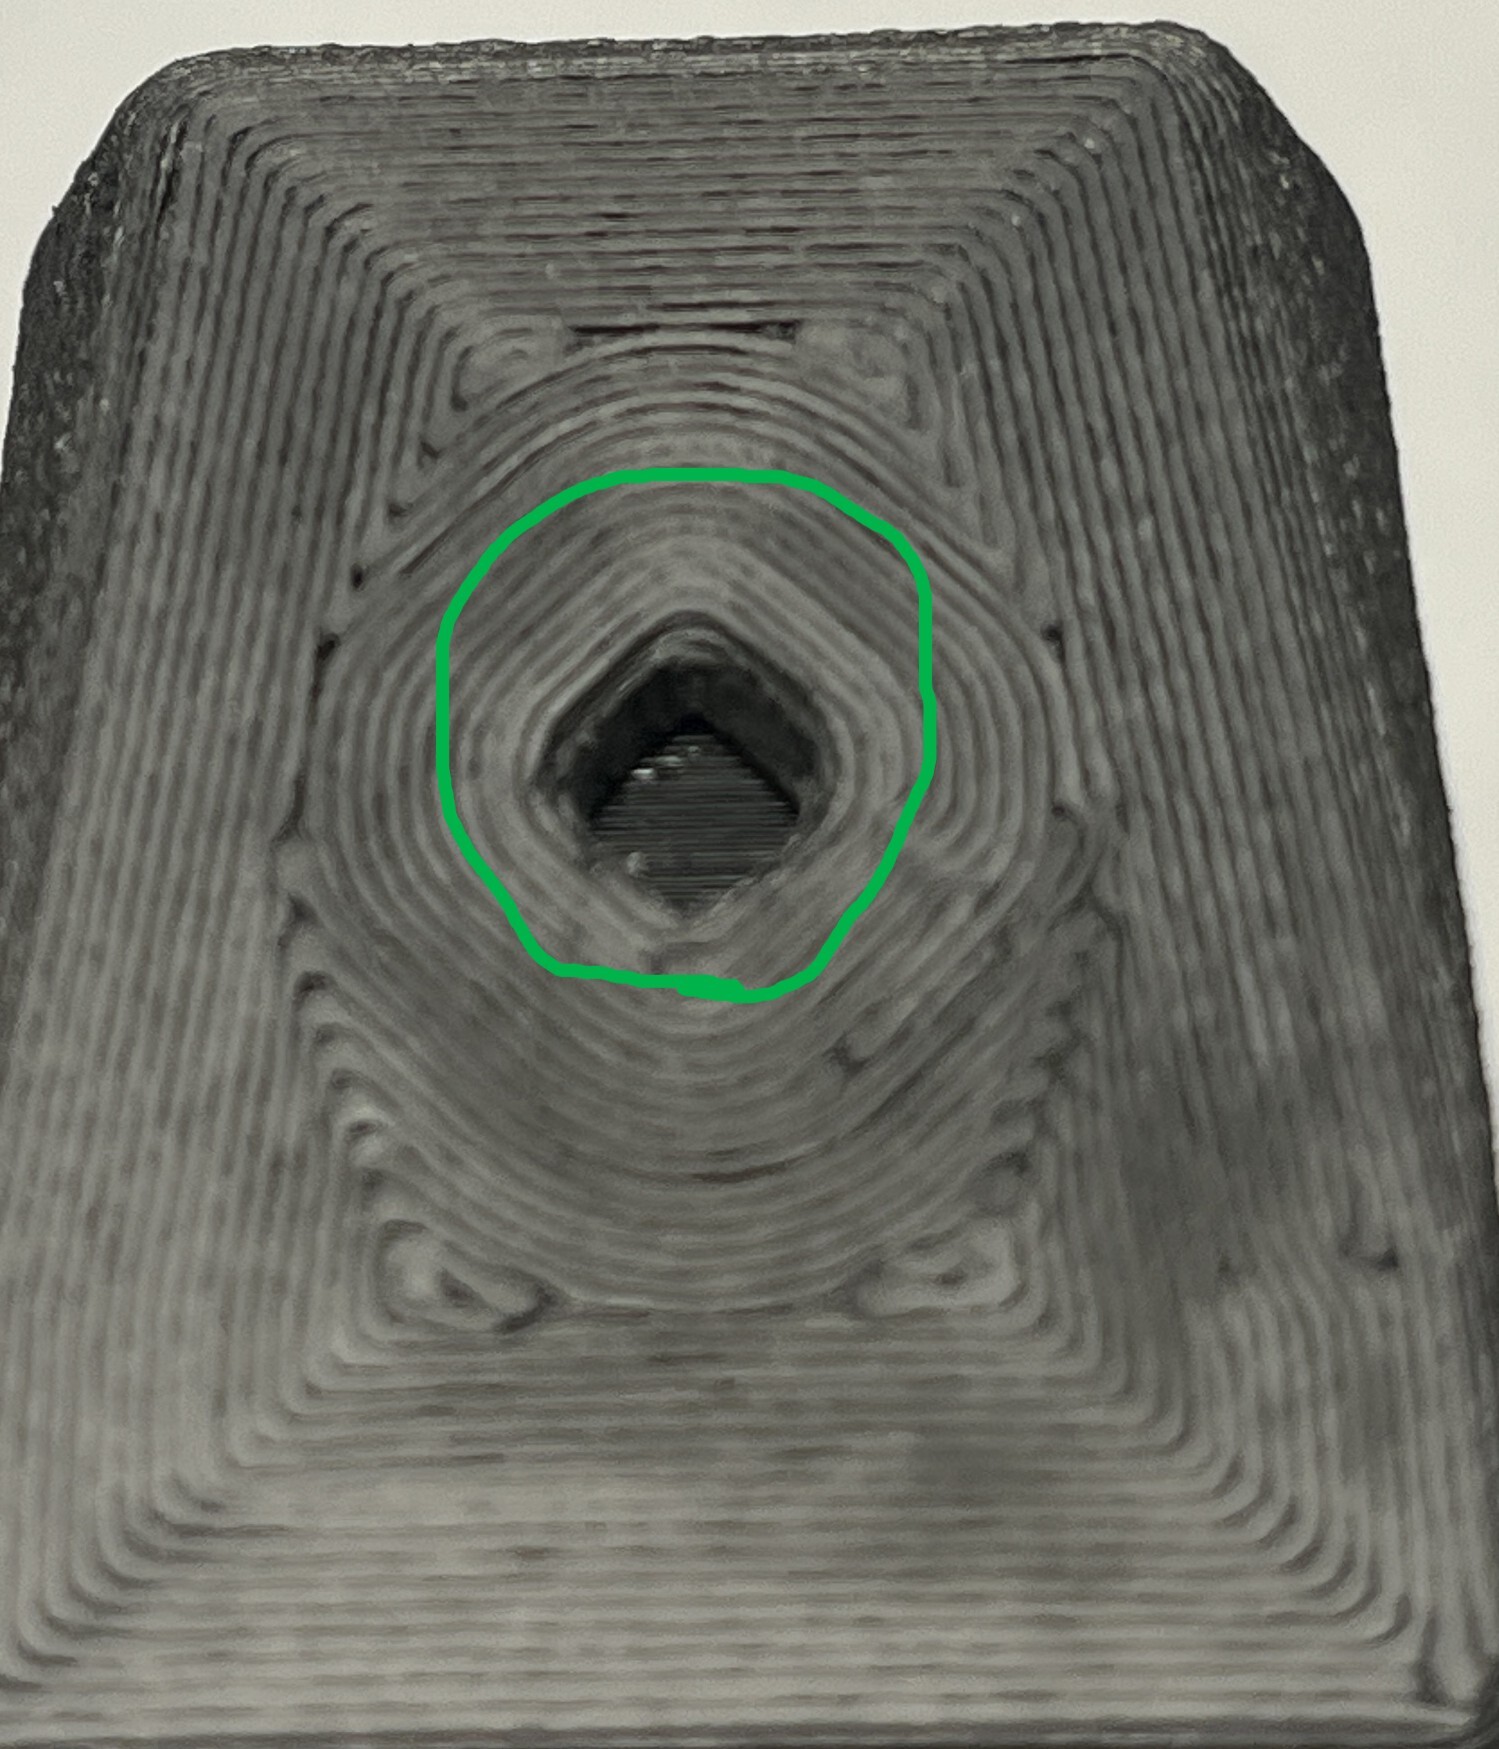
- If the insert does not fall down in the extension:
- Ensure extension is fully seated onto the magazine body
- Load magazine completely to force insert into position
- May not work the first time, load/unload magazine twice
- If these steps fail, take off the extension body, ensure spring is seated on insert correctly, and reassemble.
5. Fully load magazine to ensure everything is functioning correctly and magazine is holding the correct amount of ammunition.
-
- Sometimes, newer springs are stiff and require to be loaded/unloaded a few times.
- If there are still issues loading the last round, take off the extension body, ensure spring is seated on insert correctly, and repeat step 3.
- DO NOT move onto step 4 without completing this step.
Step 4: Lock the Rear Dovetail Retainer
- Locate the dovetail slot on the rear of the extension body where it meets the back spine of the magazine body.
- Align the Dovetail Rear Retainer key into the top of the dovetail channel.
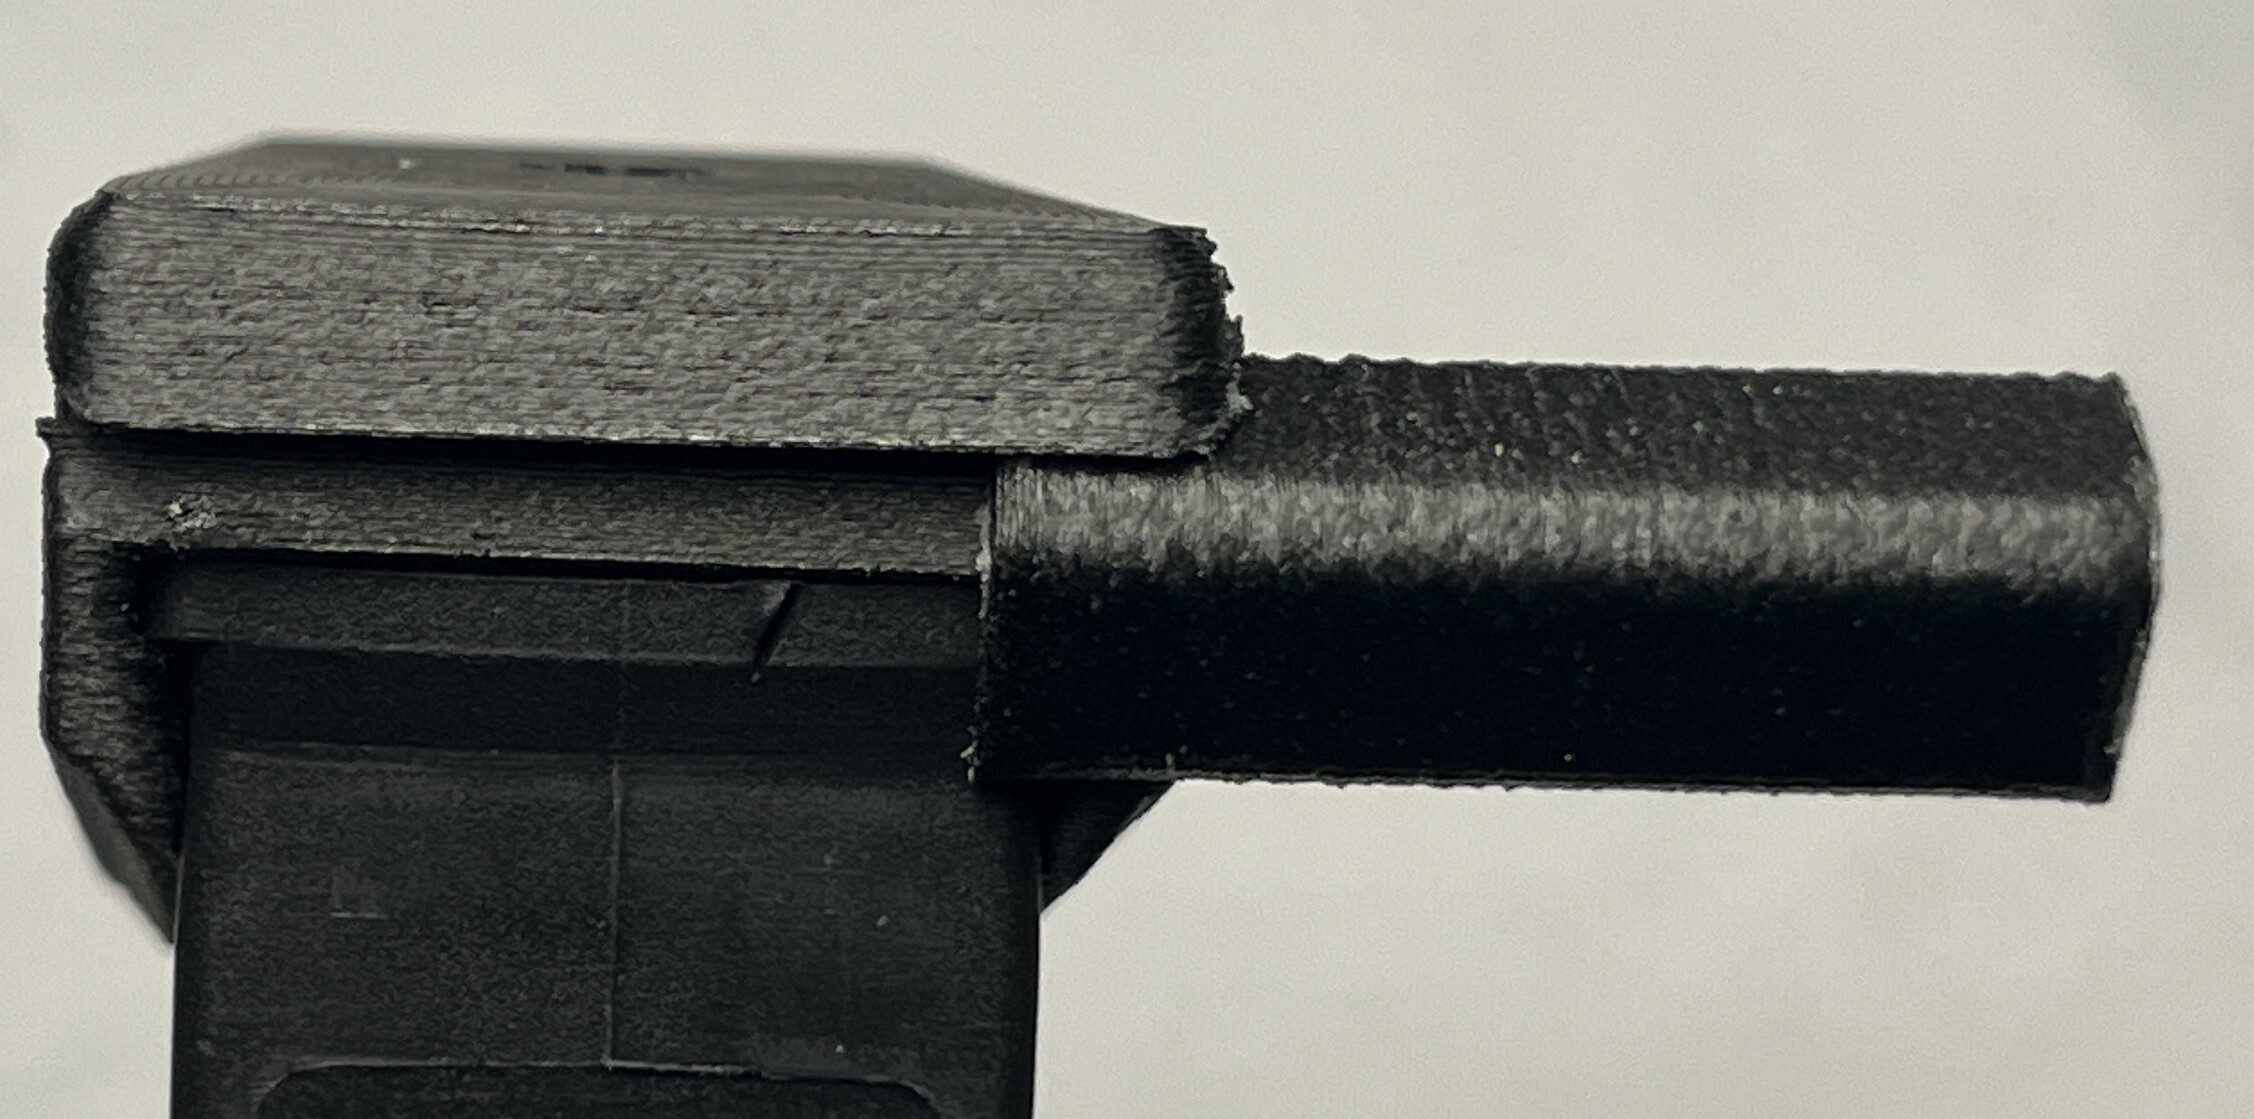
3. Using a rubber mallet or light hammer, lightly tap the retainer downward until it is completely seated flush with the body.
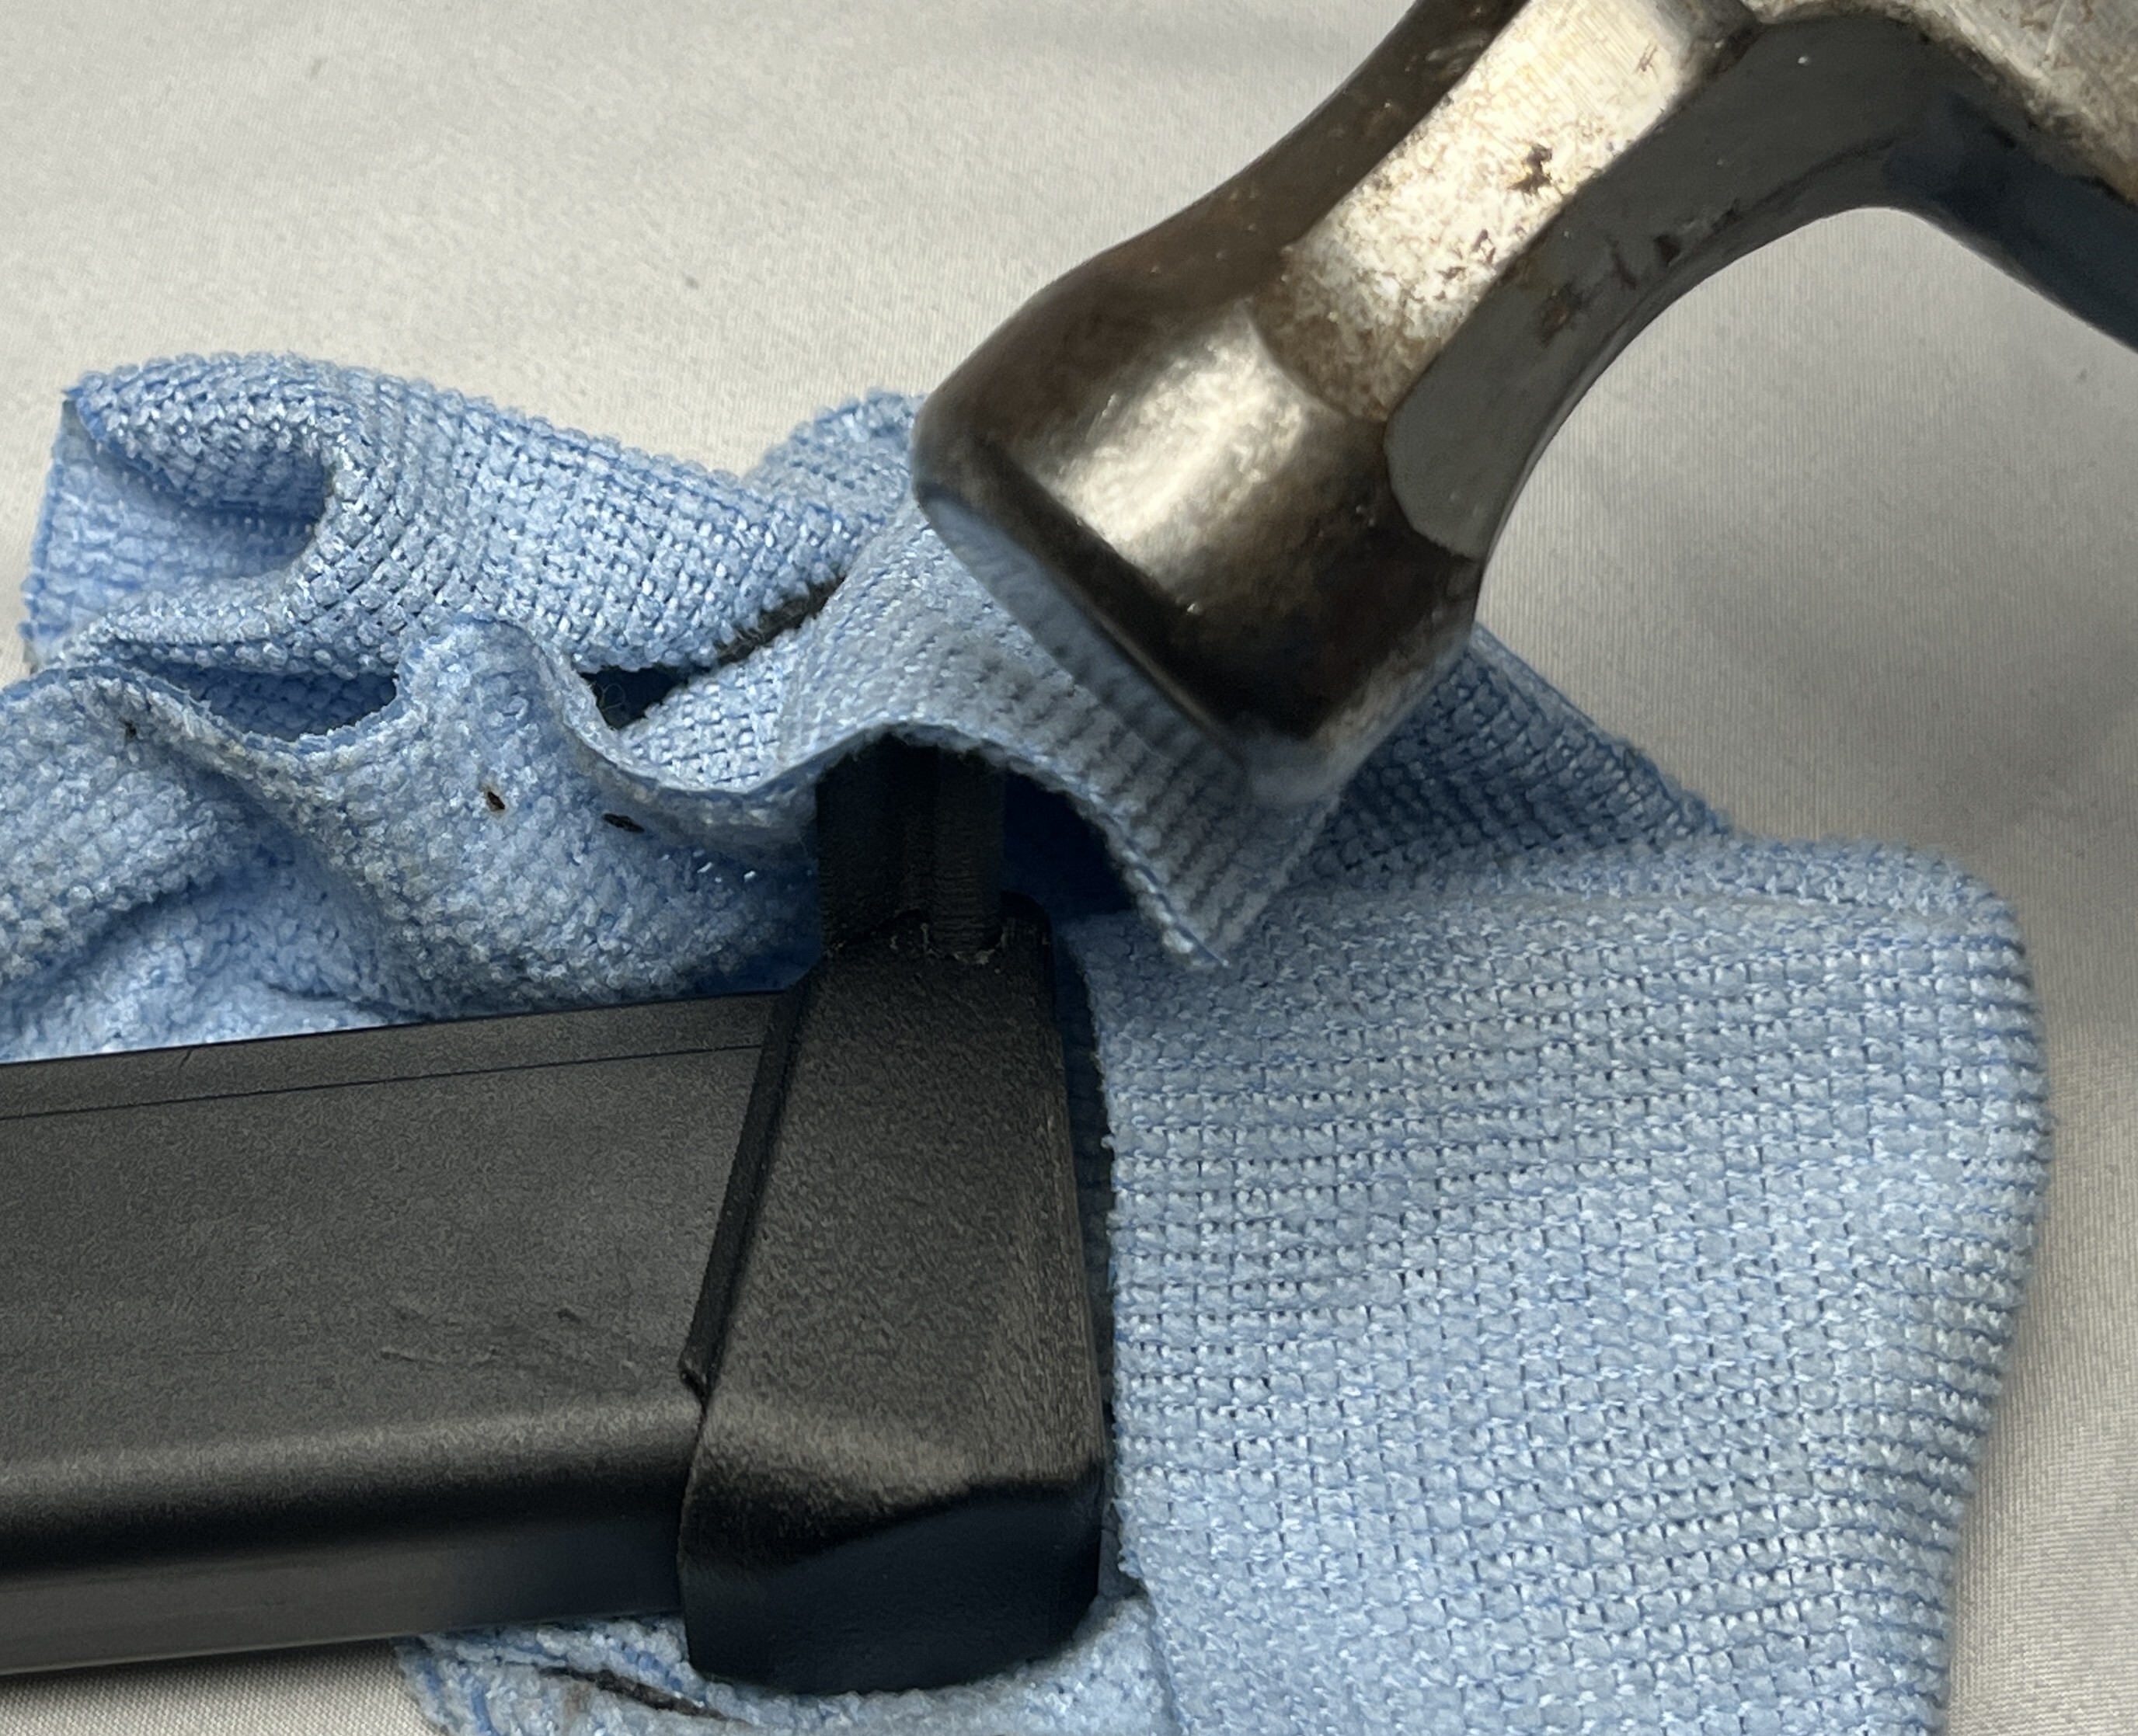
-
- Using a microfiber towel to protect the underside of the baseplate is recommended.
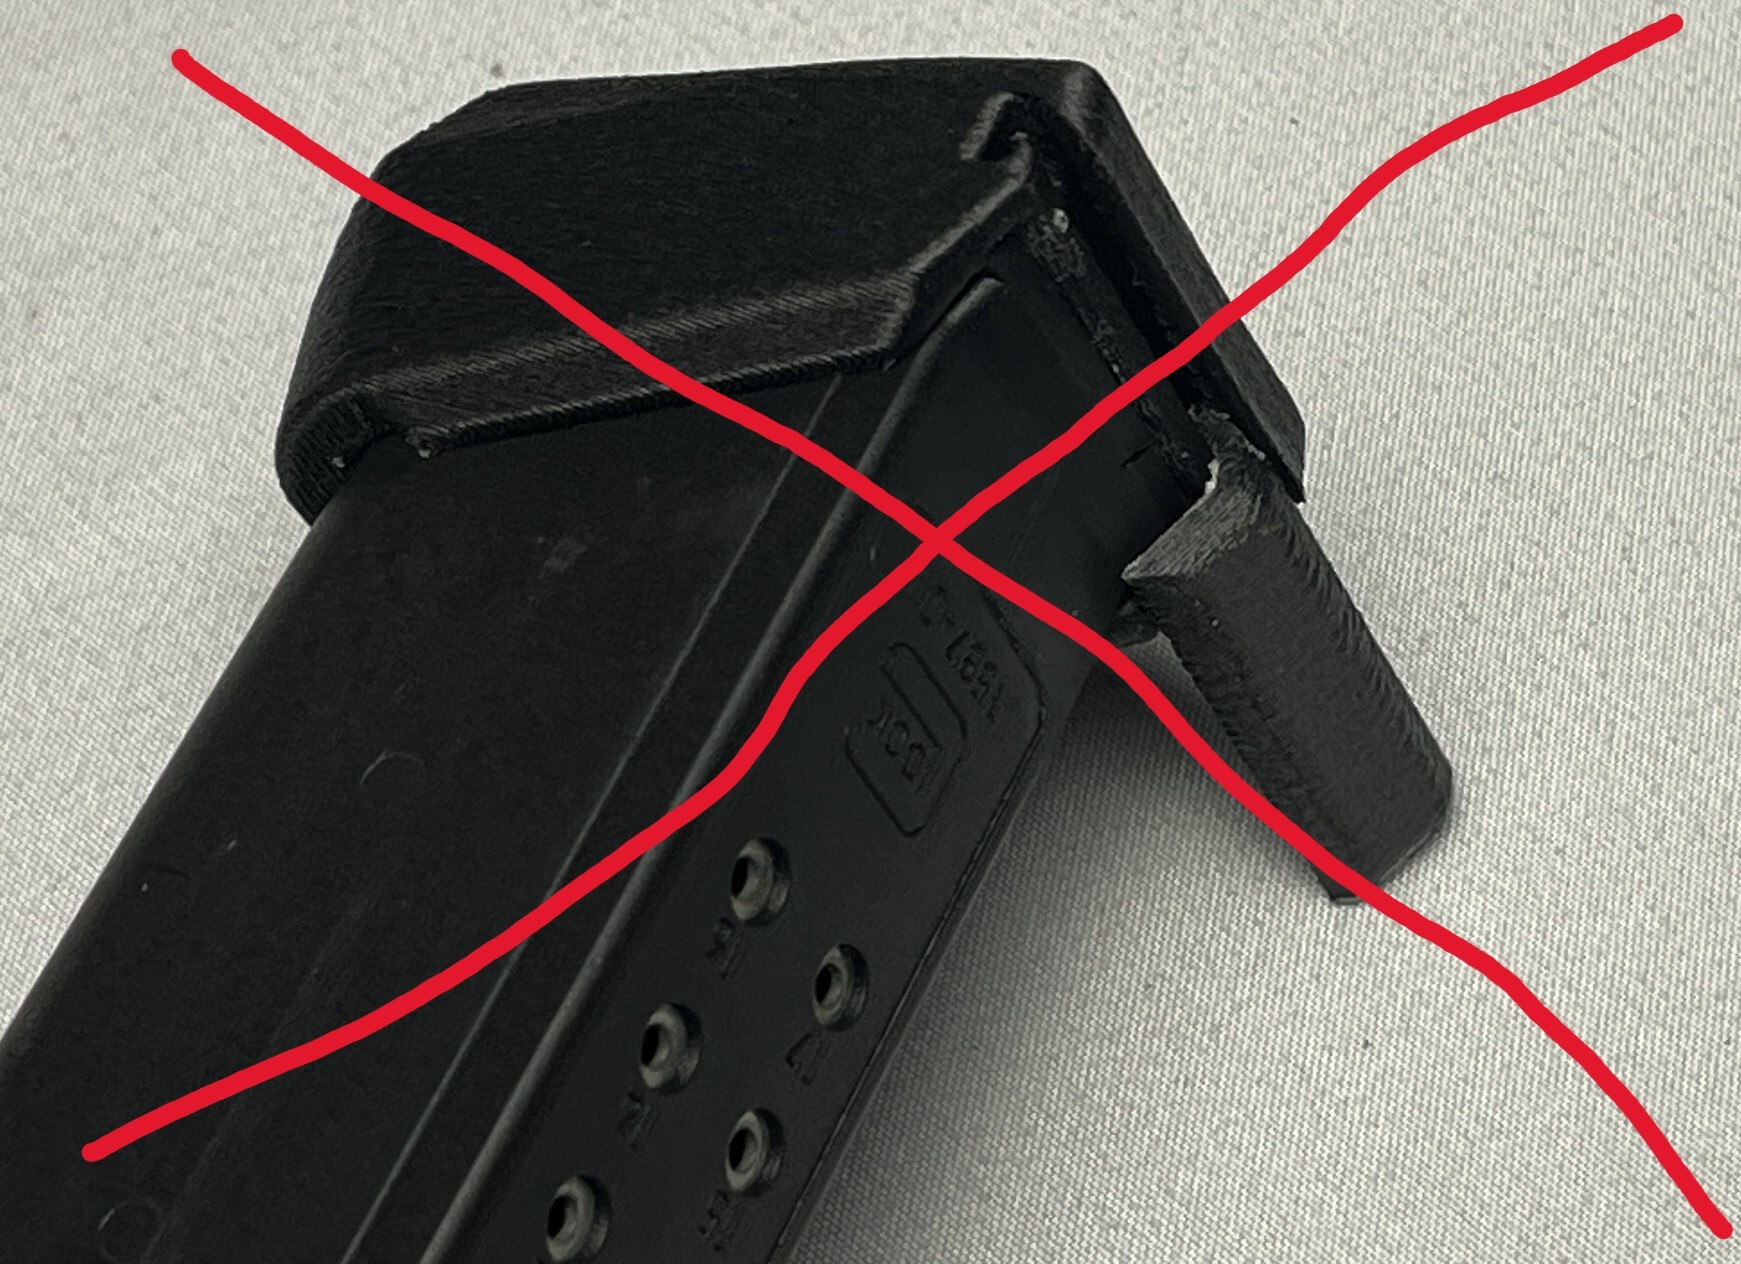
- Pushing the retainer against a hard surface is NOT RECOMMENDED. The retainer may become misaligned and “jump” out of the dovetail, damaging it in the process.
NOTE ON SPRINGS:
Typically, new OEM spring will work fine with these extensions. Older, warn out springs may need to be replaced with +power springs. To test, fire one round to see if magazine will lock back the slide on empty. If it locks back consistantly, everythiing is working properly. If not, a +power spring is needed.
-*This product is not manufactured, authorized, endorsed, or warranted by GLOCK. GLOCK does not warrant or represent that this product is compatible with GLOCK pistols.